S is for Stocks. Although there have been stocks in Roydon since "date uncertain", they have been substantially rebuilt since that time and perhaps even more than once. "Most recently in 2016" according to the Parish Council web site.
I'm assuming they don't still see use, but that does make one wonder why they keep rebuilding them. Maybe it's to attract motorcyclists to the village to take pictures. Anyway I was careful to stick to the speed limit lest I end up in them
Next to the stocks is the village lockup, which looks like a small wooden shed. Apparently this is where in former times criminals were held until they could be brought before the magistrate.
It looks very low to the ground. Perhaps they expected to lock up only short people, or just didn't see why the detainee should be able to stand up.
I did try for a photo of the inside, but I don't really know what I'm looking at here. Its possible that the low height is because it was partly set into the ground, but its equally as possible that the floor has rotted away and been removed
I am experimenting with running Kurviger on one of my (several) old
Android phones as a dedicated "satnav" for the bike, but tbh am not
sure it's worth it.
the phone mount blocks the ignition keyhole, so I have to remove the phone to put the key in
if I disconnect the phone from its usb cable when I stop, so it doesn't drain the bike battery, next time I ride then I've drained the phone battery. Or I have to disconnect and remove it and take it inside to charge. [ Later note: not any more ]
if I'm in the house plotting routes for my next ride, there's now an extra step to copy the route to my on-bike device
and I need to enable the wifi hotspot on my actual phone so the on-bike device has internet. I suppose I could put a SIM in it
on the plus side, my bluetooth headset can connect simultaneously to my bike phone and to my real phone, so no problem there
and if, perish the thought, I were to crash and become separated from the bike, this would mean that my phone would go with me to hospital and not with the bike to whatever storage facility the police recover it to. If they even do that and don't just leave it at the side of the road.
My custom-moulded earplugs are here! I was not allowed to simply go and collect them, I had to make an appointment with the audiologist to have them handed over. (The appointment consisted of them being handed over, and me putting them in my ears: presumably it would have been more involved if I hadn't succeeded in that act)
Red is right ear, blue is left ear and you can see they're both a lot fatter than the off-the-shelf Pinlock earplug I put in there for comparison - which might explain why I was not getting a whole lot of volume reduction from the Pinlocks. Texture is "slightly squishy", I guess they're made of some kind of silicone compound.
They came with a soft case and the hard case pictured. Both cases are far too large for the purpose, but the plugs are a little too girthy to fit in the small metal keyring tube that I've been keeping the Pinlocks in. Not that I'm complaining about the size when it's a consequence of them being big enough to fit my ears, you understand.
I put them in for ten minutes to ride home and they do noticeably attenuate the sound, but I didn't get to more than about 45mph so I don't yet know how good they are at motorway speed.
The visible branding is Specsavers, but they're actually made by Minerva
T is for Train. This bright yellow engine was used in the London Underground works at Acton as a shunter to push dead trains up and down the hill. It's made of two Piccadilly Line locomotives welded together (and a number of "bits box" parts making it a quite unusual artifact) and now lives at the Epping Signalling Museum
I don't have any photos of the inside, but I got shown all around it and had the controls explained. About a third of it by volume is given over to giant high current resistors: line voltage on the tube is (was) 650v and if you want to travel at less than full power ... that power has to go somewhere. I'm told that they glow red when in use
This is the view from one end: in the middle at the bottom you can see two sets of couplers so that it could be used with both tube and surface trains. The door was welded shut so that the driver was not tempted to open it/lean out/fall out while attaching to the train, then a glass pane set into it so that he could still see what he was doing.
The other end looks more like a normal tube train cab (and the door opens), although still painted bright yellow.
The rest of the museum is in the adjacent former signal cabin, including this restored signal frame with 47 levers. Epping was complicated to signal as it had passenger trains and also goods steam trains (longer stopping distances) for the brick works and gas works which also used to be here.
Under the desk, the levers are linked to very hefty sliding metal rods with cutouts and dogs and things that provide mechanical interlocks preventing the operator from e.g. setting a green signal for two trains that would merge onto the same section of track and colliding. It's a hardware state machine. The levers eventually operate relays which operate pneumatic switches that operate signals or throw points using compressed air.
A signal frame seen from underneath. Some of the bits go side to to side when the levers are thrown, and this causes other bits to be prevented from going side to side. I think. Boolean logic in hardware.
There at least three generations of relay design exhibited. The oldest ones ("fishbowl" relays) are ~ 100 years old and others like them are still running on some railways in India.
The "train sequencer" machine is a mechanical paper tape reader that knew which train should be where (separate decks for weekdays and Saturday services). Left hand columns were timecode and right hand columns were for the train number. It operated ... relays. There are a lot of relays.
Anyway, if it wasn't already obvious I found the whole thing fascinating and a great way to spend 90 minutes.
It was however only 10 miles from home, so not a whole lot to say about the motorcycle trip there. I am attempting to build a habit of doing shoulder checks whenever I move off (although I did as a result get uncomfortably close to rear-ending a police car the other day, which would have been incredibly embarrassing. There's a time and a place, I suppose)
It is legal in the UK to retrofit LED bulbs(sic) into an existing
motorcycle halogen headlamp fitting - provided that the beam pattern
is correct and so on and so forth.
The MOT rules were changed in January 2021 to explicitly fail retrofit
LED lights, and then again in March 2021 to not fail retrofit LED
lights, but only for motorcycles and for cars that predate 1986. (You
might notice that the MOT special
notice
which makes this explicit is withdrawn, but that's a normal process
when special notices get subsumed into the next version of the manual
itself)
Doing the swap turned out to be simpler than I anticipated. The
pictures in the Haynes manual are grainy and unclear, but I've seen
enough video guides of motorbike tasks to know that I hate watching
them, so here's my attempt at documenting the process using words and
pictures only.
[There are some images with no alt texts in this thread, because they're just
showing what the body text is already describing]
First, choose a compatible bulb. For a CBR600F of this era, that's
H7 - and because there's a big rubber boot that fits over the back of
the headlight, preferably a bulb without a huge great heatsink
sticking out of its base, or any kind of separate transformer box.
And as I want to be reasonably sure that the light is going where I
want it and not straight into the the eyeballs of oncoming road users,
it also needs to be a bulb whose light source is the same size and in the same place as
the filament would be in a filament bulb ,otherwise it'll bounce off
the reflector in the wrong places.
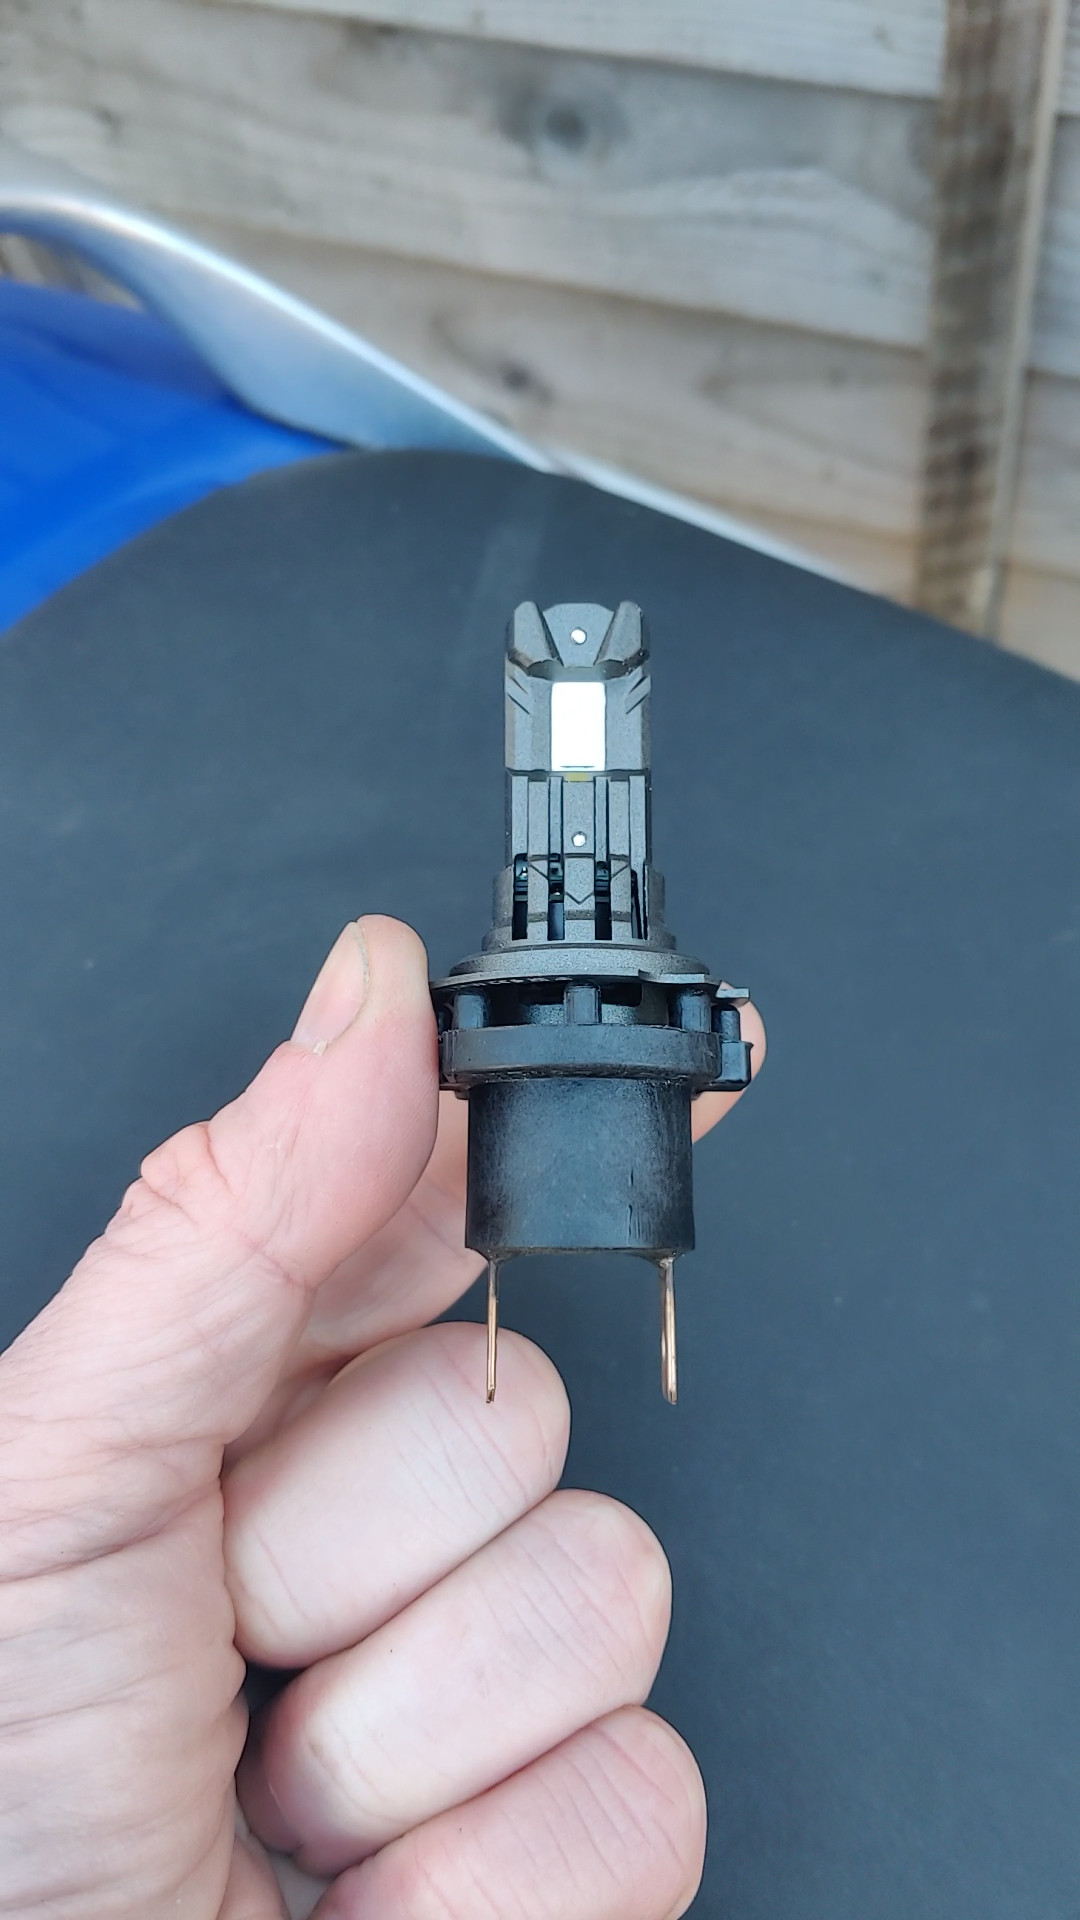
Philips Ultinon Access meets the dimensional criteria and as it's a
reputable brand not an Ebay special I'm relying on it not to spray
photons at the sky.
To get to the bulb: first, remove the grey plastic "armrest" thingy on each side: undo two bolts and then carefully manoeuvre and flex the three different bits of interlocking plastic that have prongs sticking into each other, until it comes away. I also slackened off the two bolts holding the front of the fuel tank so that I could lift it slightly.
The headlights are under the dash. The plug pulls off (no fancy release mechanism, just friction) and then the big rubber boot thing can also be pulled away.
Now unhook the hinged wire retaining clip and it swings open rightwards.
These pictures show both closed and open states (although they are for
different lights and taken on different days: my continuity supervisor
is down the pub already)
Now the bulb should just come out. Don't get your fingers on the glass parts of a filament bulb, not if you're going to keep it.
Here is where I reached for the new bulb and realised that the base of
the old one was apparently bigger. Turns out that the bulb plugs
into an adapter thing, so we take the two parts apart by pulling them (again, no clips or catches just an interference fit)
and push the new bulb into the adapter instead.
Reassembly is, to coin a phrase, the reverse of disassembly. Taking phonecam photos of a light source is probably pretty pointless - during daytime, likely doubly pointless - because of auto exposure, but I did it anyway. The dipped beam only turns one light on (this is normal) and the full beam seems to be very very bright, but maybe that's full beam doing what full beam does.
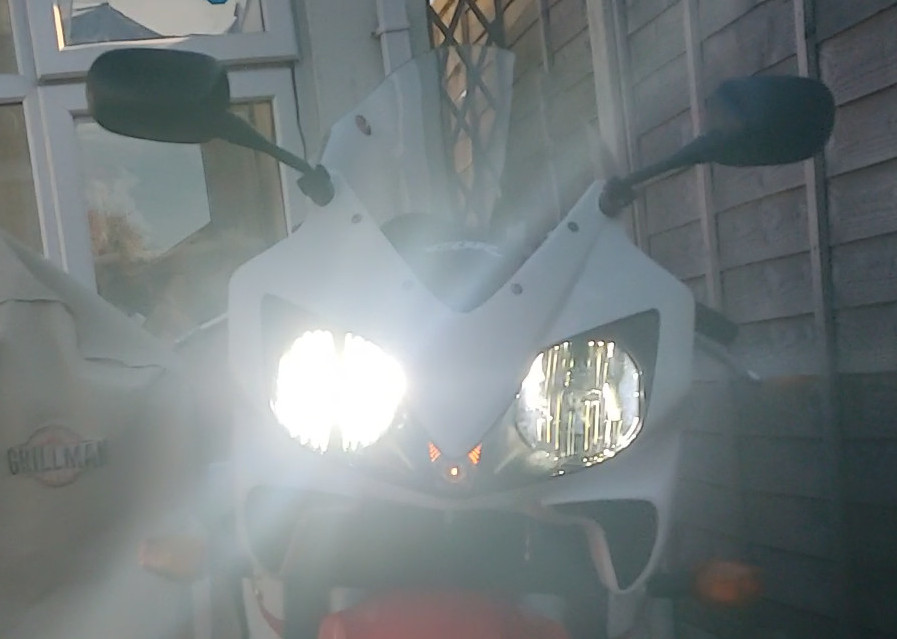
A better test was conducted after night fell, but my phone decided to take the "before" and "after" photos with different exposure settings (and it's not even as dark in the first one) and I'm buggered if I'm replacing the old bulbs in the dark for a side-by-side comparison. If it looks brighter even though there's more ambient light, that's good right? (Science r us)
The cutoff does seem to be a bit higher with the LEDs - unless the angle is different and I'm looking at the kickup there (UK roads, we drive on the left). Looks like I'll have to measure that properly and maybe adjust it
I bought this Skidmarx rear hugger back in August but when I (perhaps foolishly)
asked my insurer about it they said it would add £200 to my premium so
I didn't fit it then. Fast forward to renewal time, at which time I
told the insurer I had a hugger and crash bungs and braided brake
lines (which I haven't even ordered yet but intend to) and it made all
of about £3 difference to the renewal price, so yesterday I added this
to the bike.
Fitting was a little bit involved because I had to remove one of the
rear footpegs which meant removing the rear fairing to get access to
the nut it's attached with, but nothing particularly complicated.
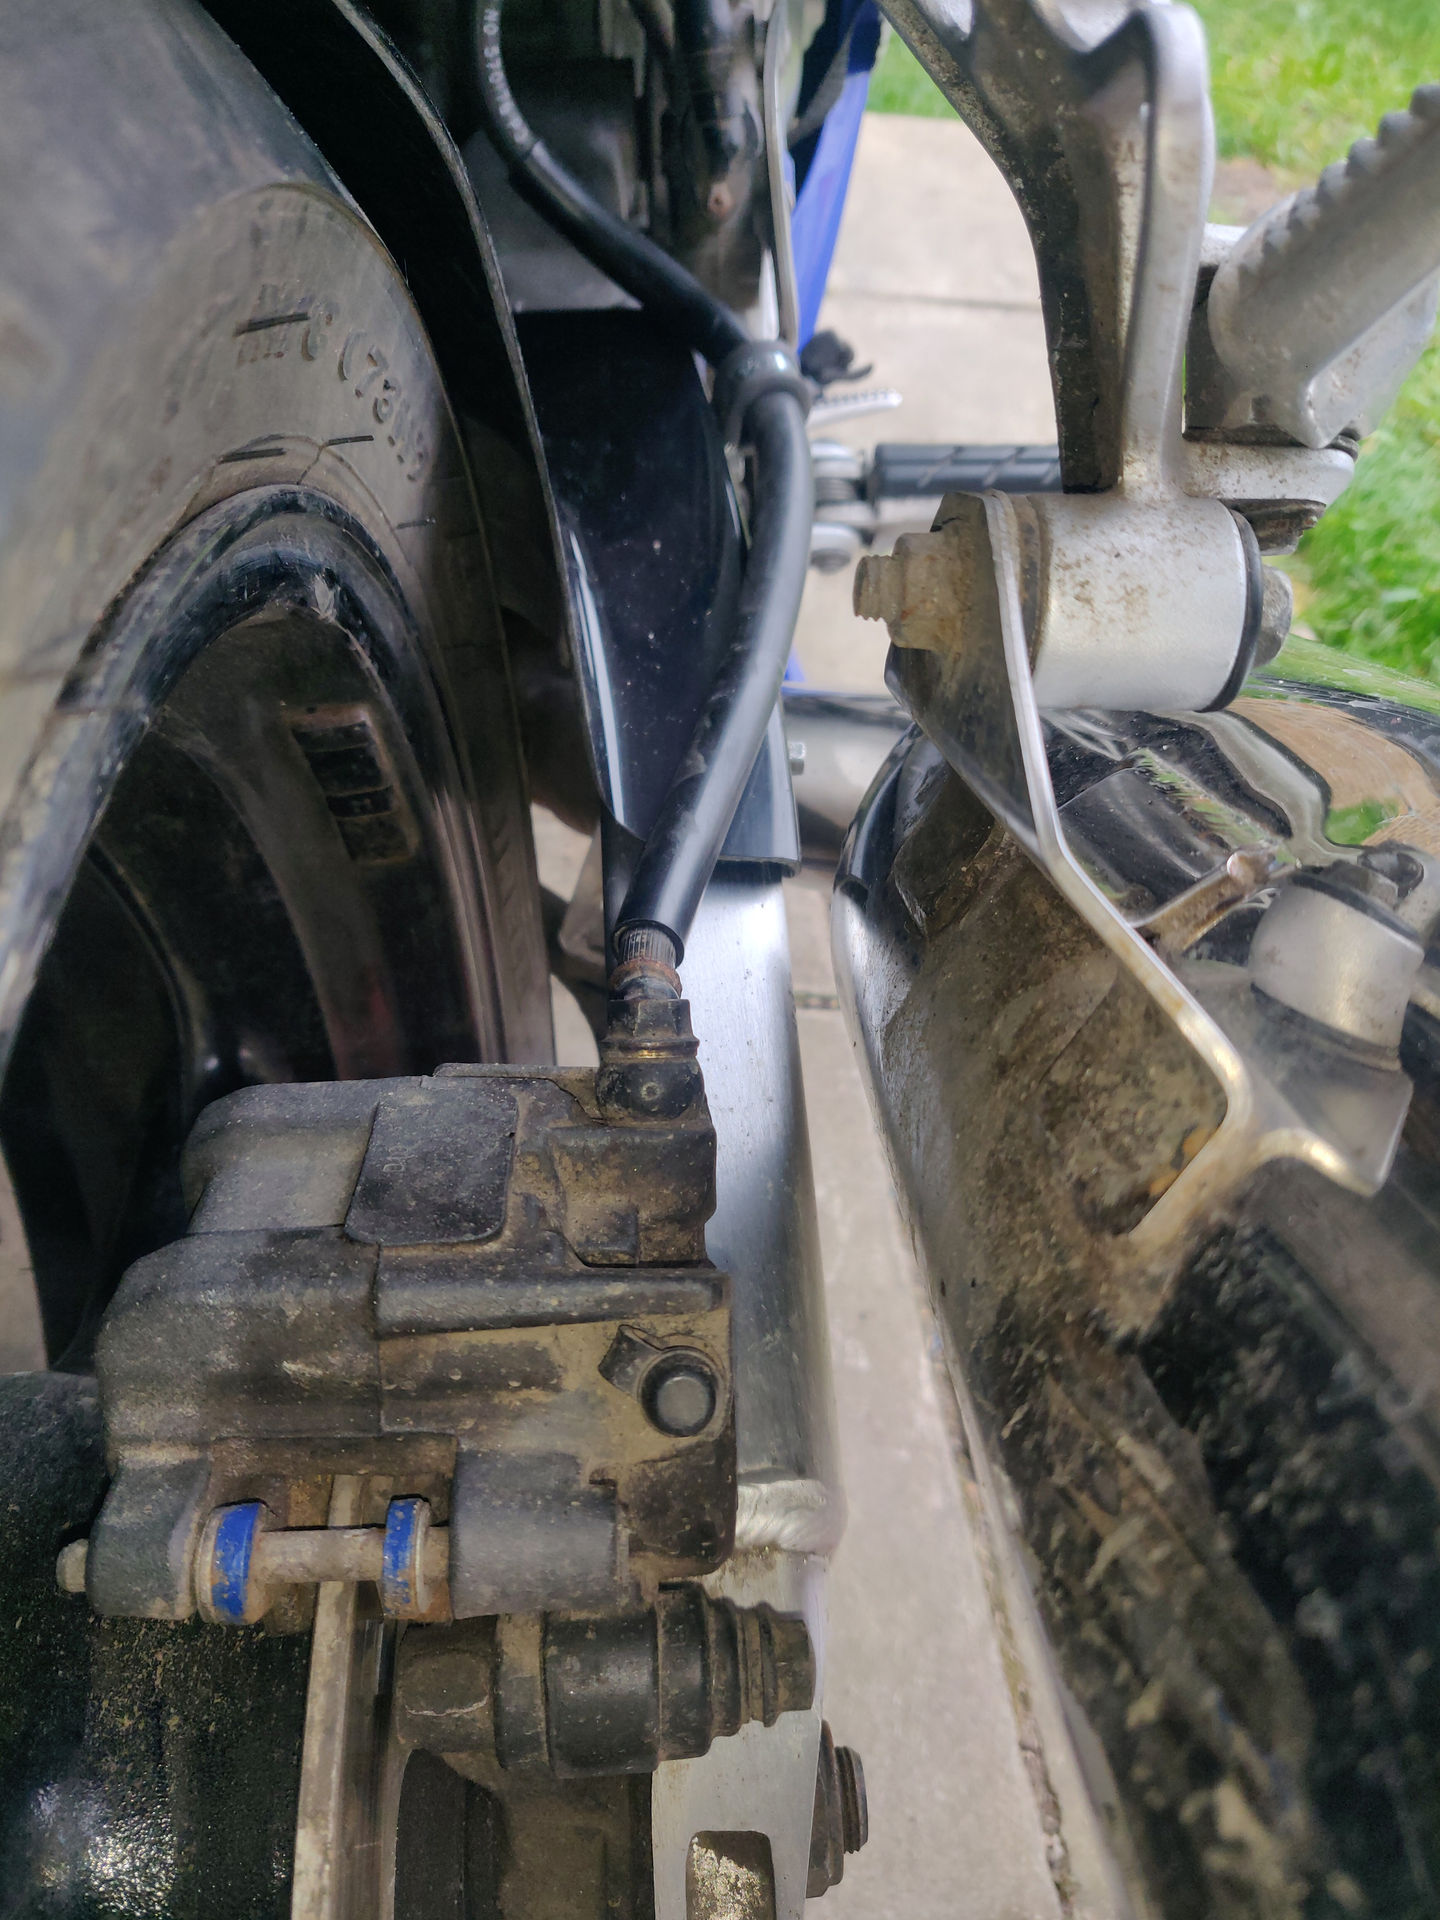
Having said that I'm a little disappointed, to be honest:
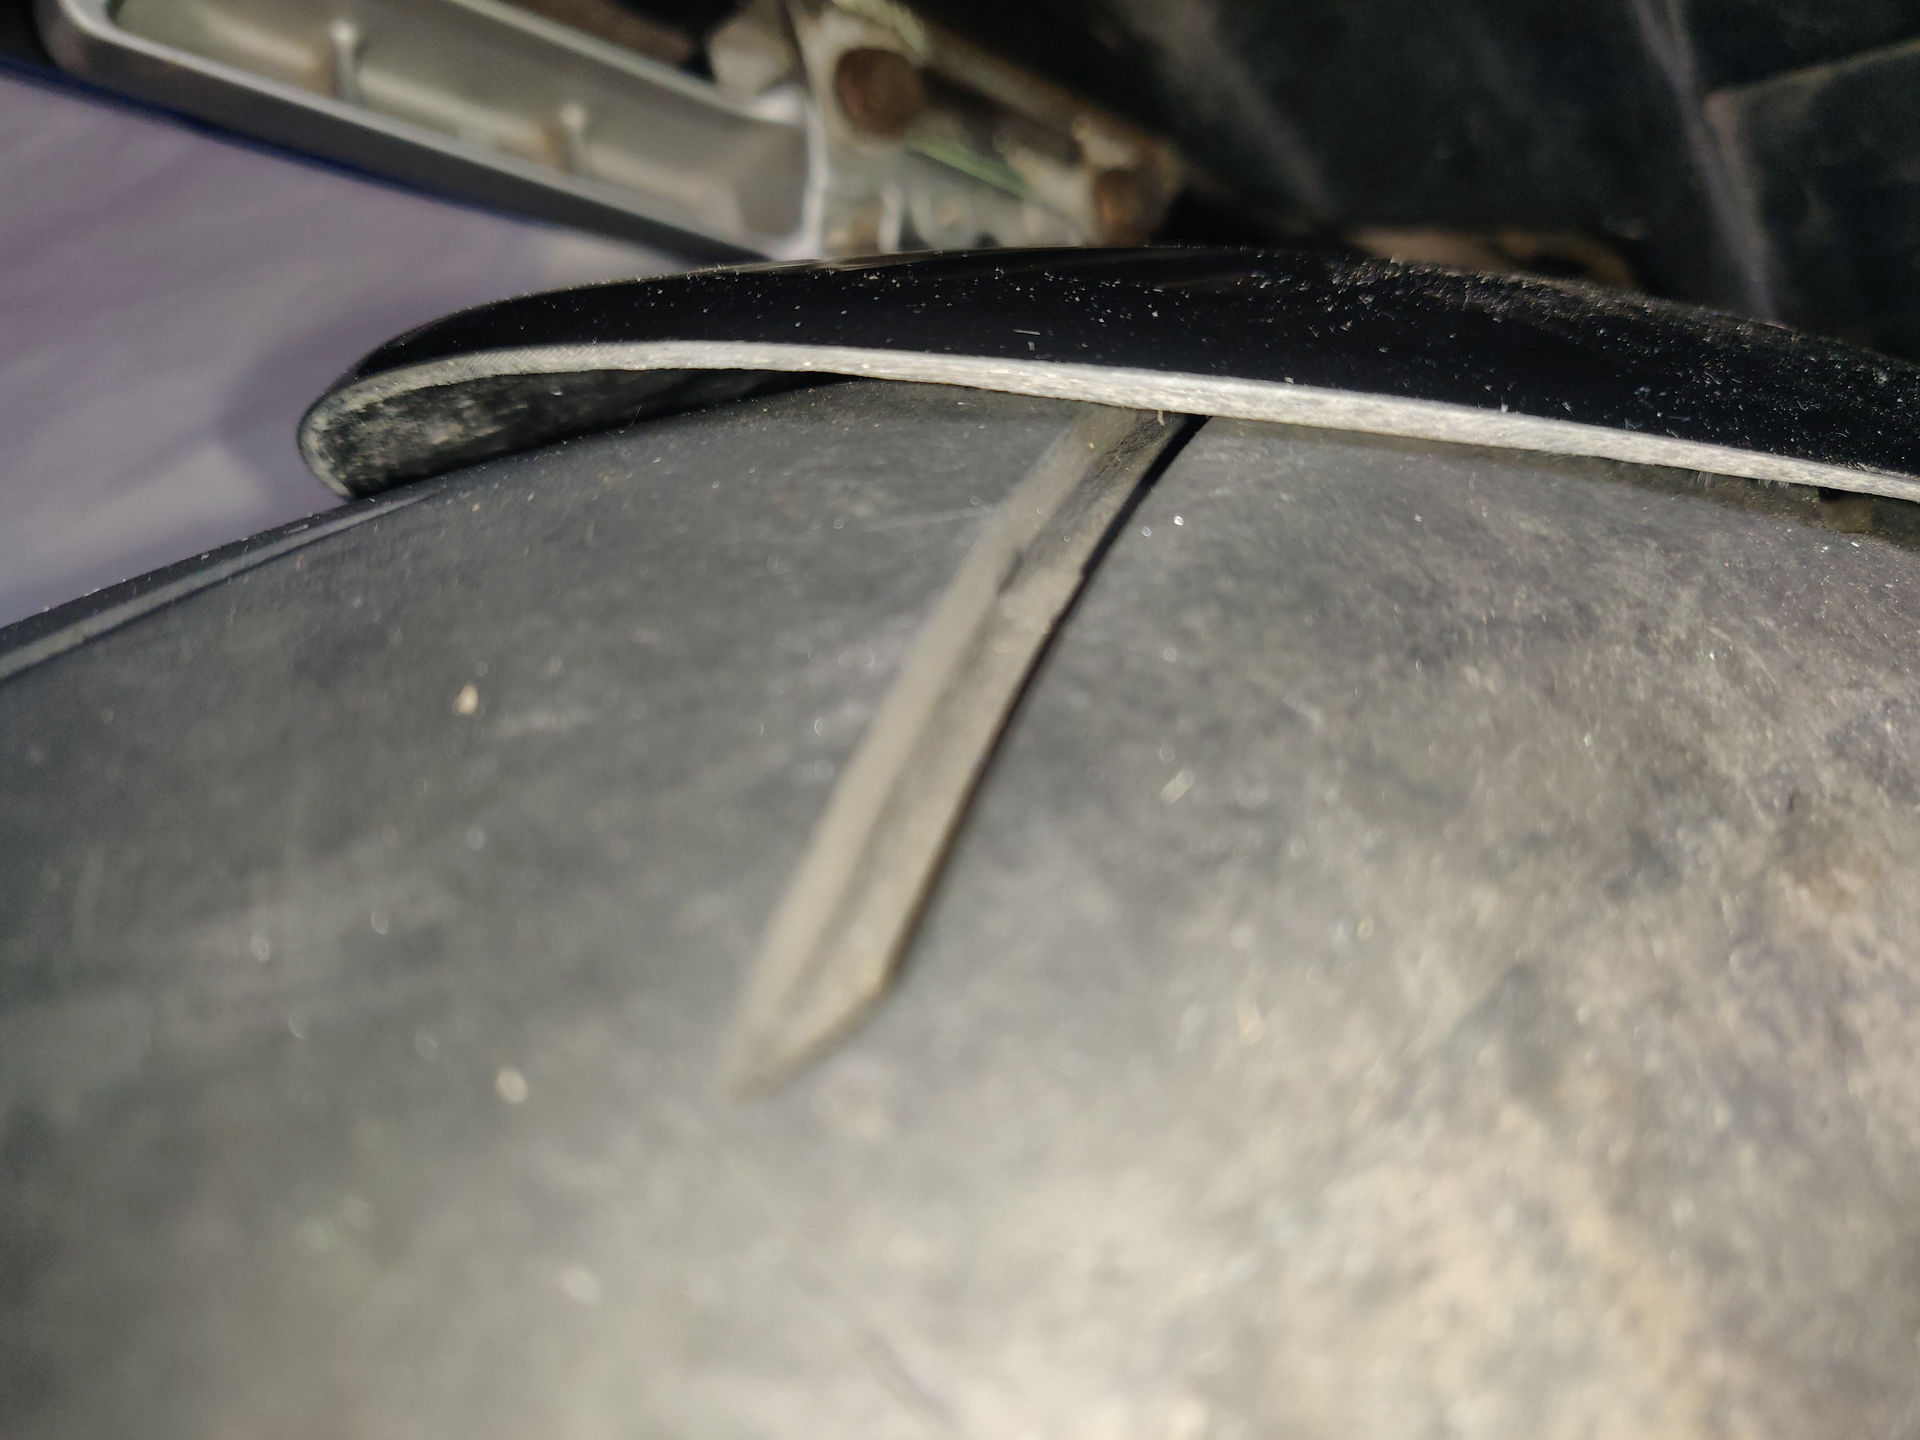
it naturally wants to sit against the rear tyre. When I fitted it
yesterday I had to bend it to create a gap between hugger and tyre,
and then tighten all the bolts while it was under tension. Looking
at the photo I've just taken, it seems to have moved back to almost
rubbing again, which is worrying
I had to remove the cable guide for the rear brake hose which used
to run along the top of the swingarm. They provide P-clips as
replacement, but the clips aren't long enough to route the hose
along the top of the swingarm as it was before - instead it takes
this more sinuous route which just looks silly
although the surfaces you can see are polished fibreglass and look
quite shiny, the edges are just raw and unfinished. You can only
see that close up though
I'm having very little success with web searches for "P clip with long
arm" or similar terms, but perhaps I could instead use some kind
of adhesive-backed cable clip that sticks to the top of the hugger
(something like https://www.startech.com/en-gb/cables/cbmcc3)
As for the clearance, I think I need to take it off again and see if I
can enlarge the screw holes to give a bit more range for moving it
about.
I read https://www.als-place.co.uk/hornet/how_to/hugger.php?page=0
before starting and it reminds me of the web sites of yesteryear. In a
good way! Written by a human for humans (not an AI for SEO), not a
forum post or a youtube video, describing something they've done so
that others may benefit
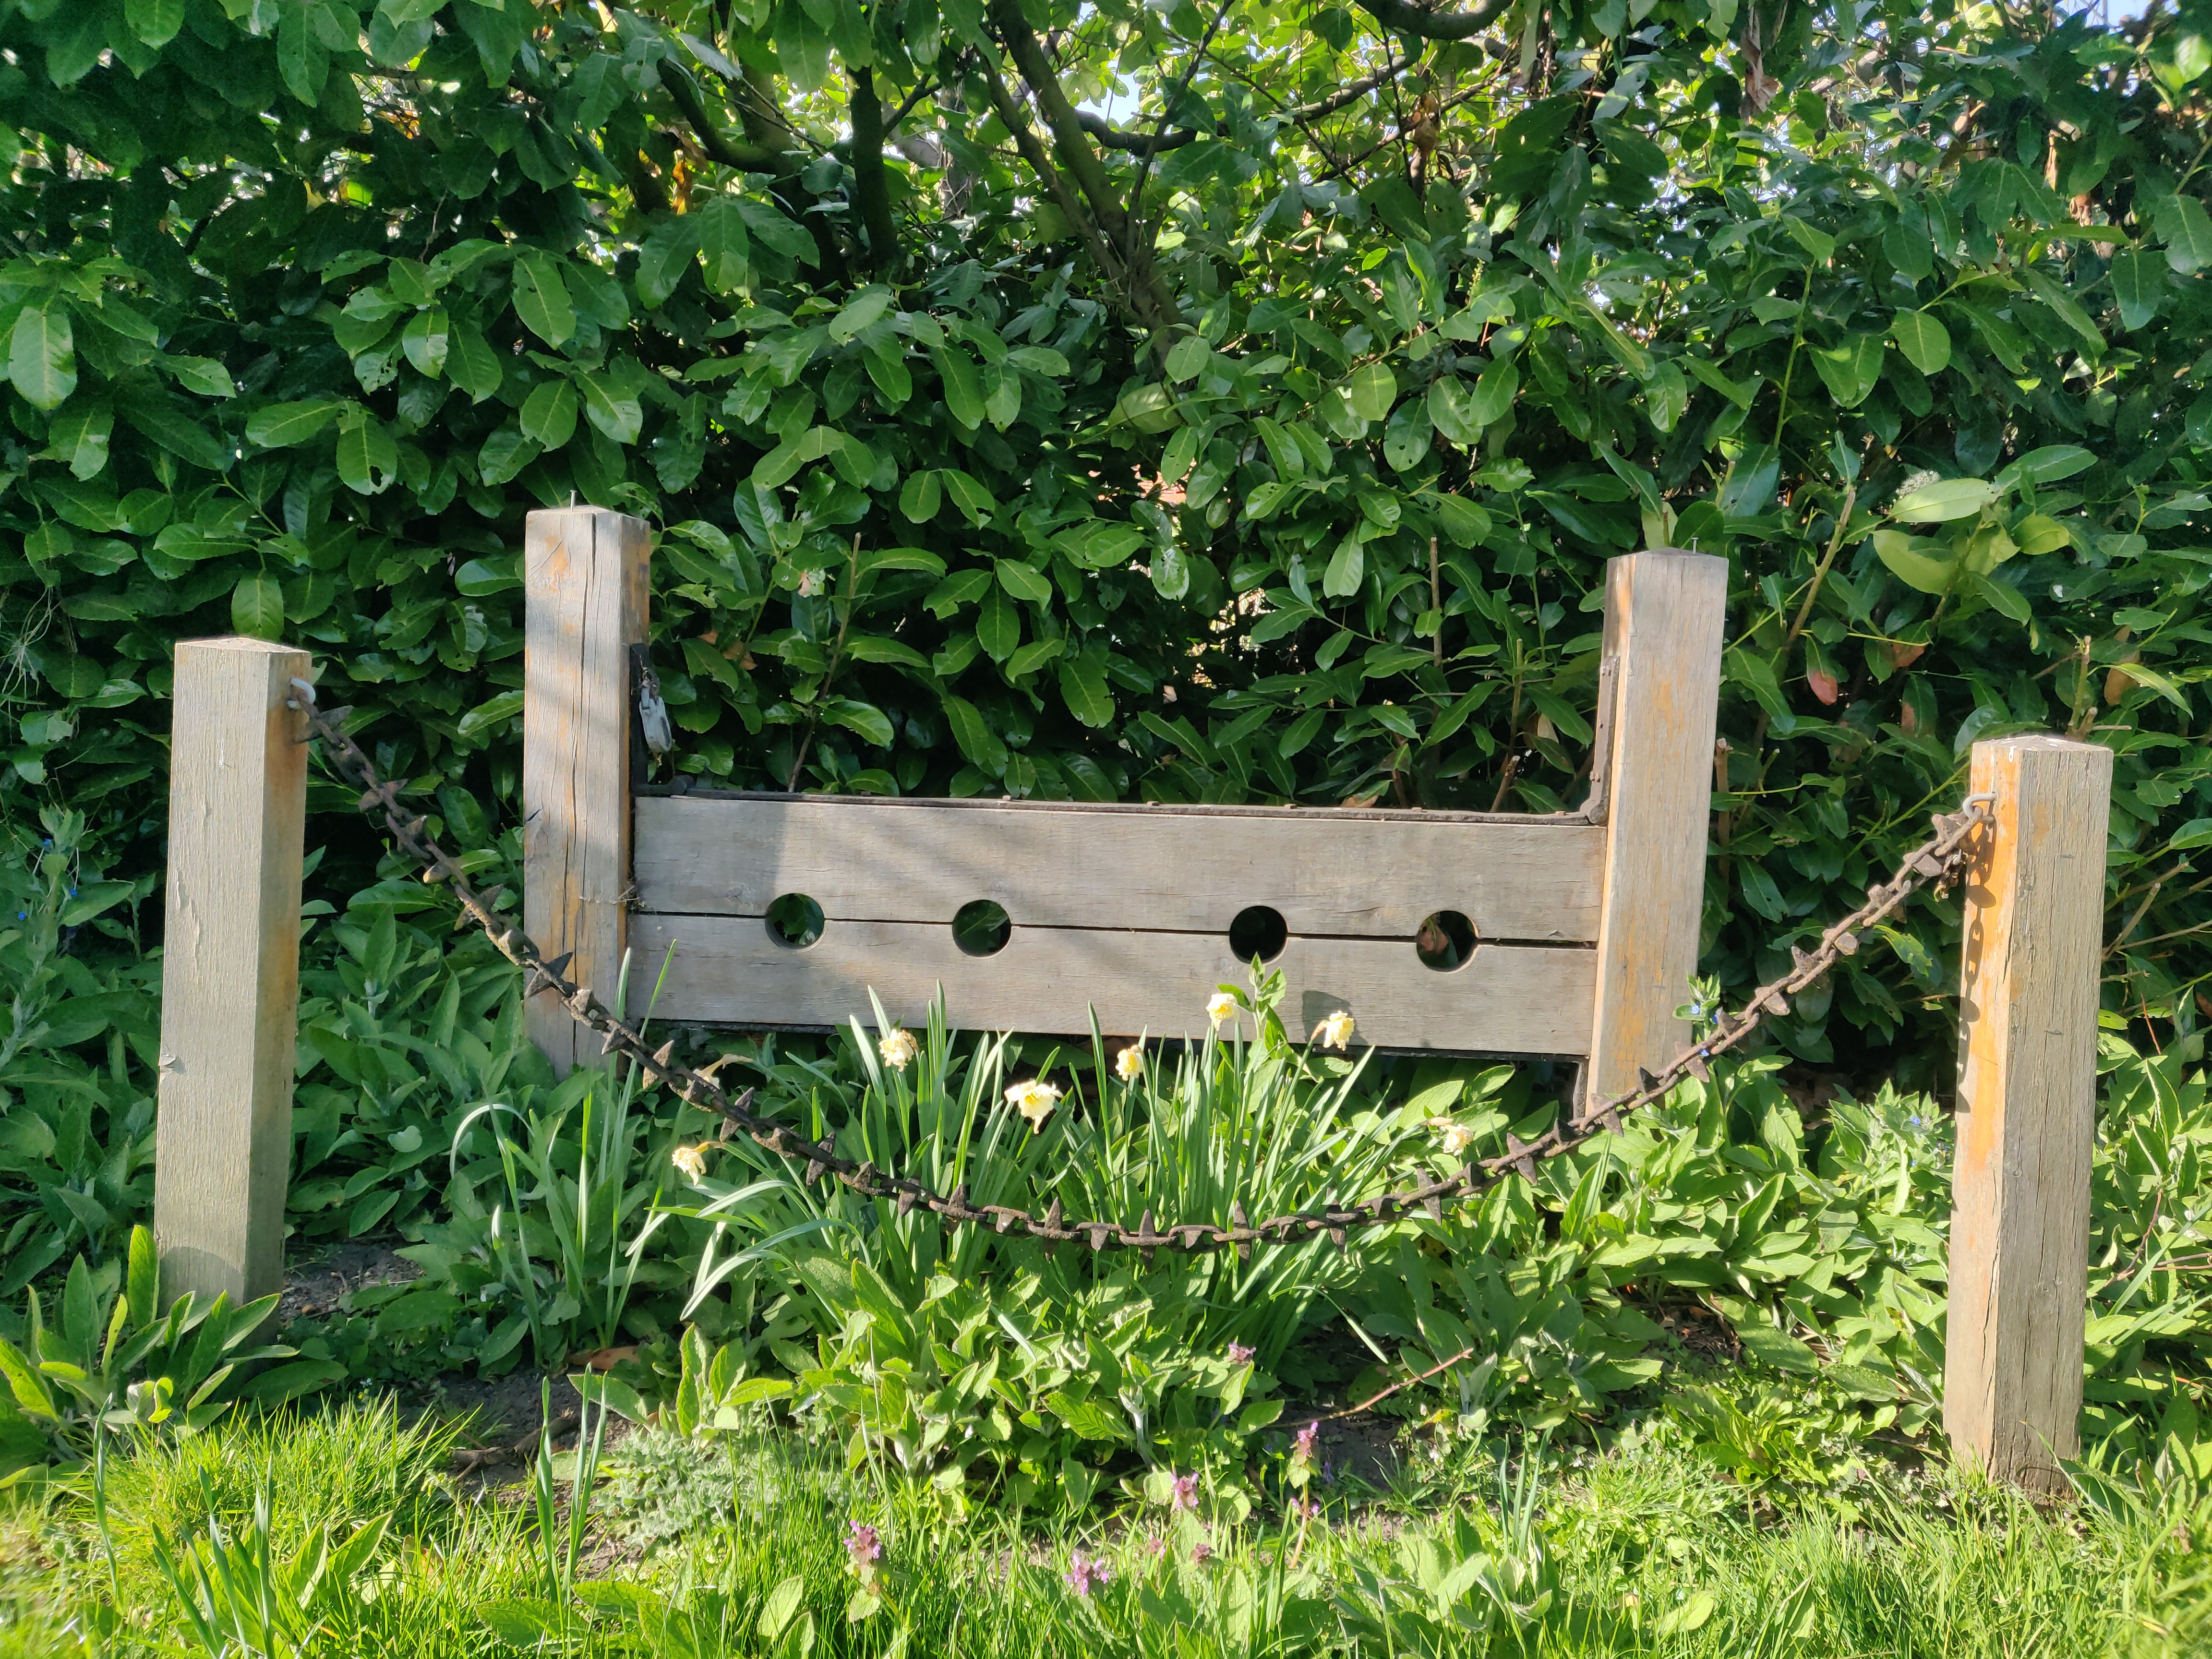 S is for Stocks. Although there have been stocks in Roydon since "date uncertain", they have been substantially rebuilt since that time and perhaps even more than once. "Most recently in 2016" according to the Parish Council web site.
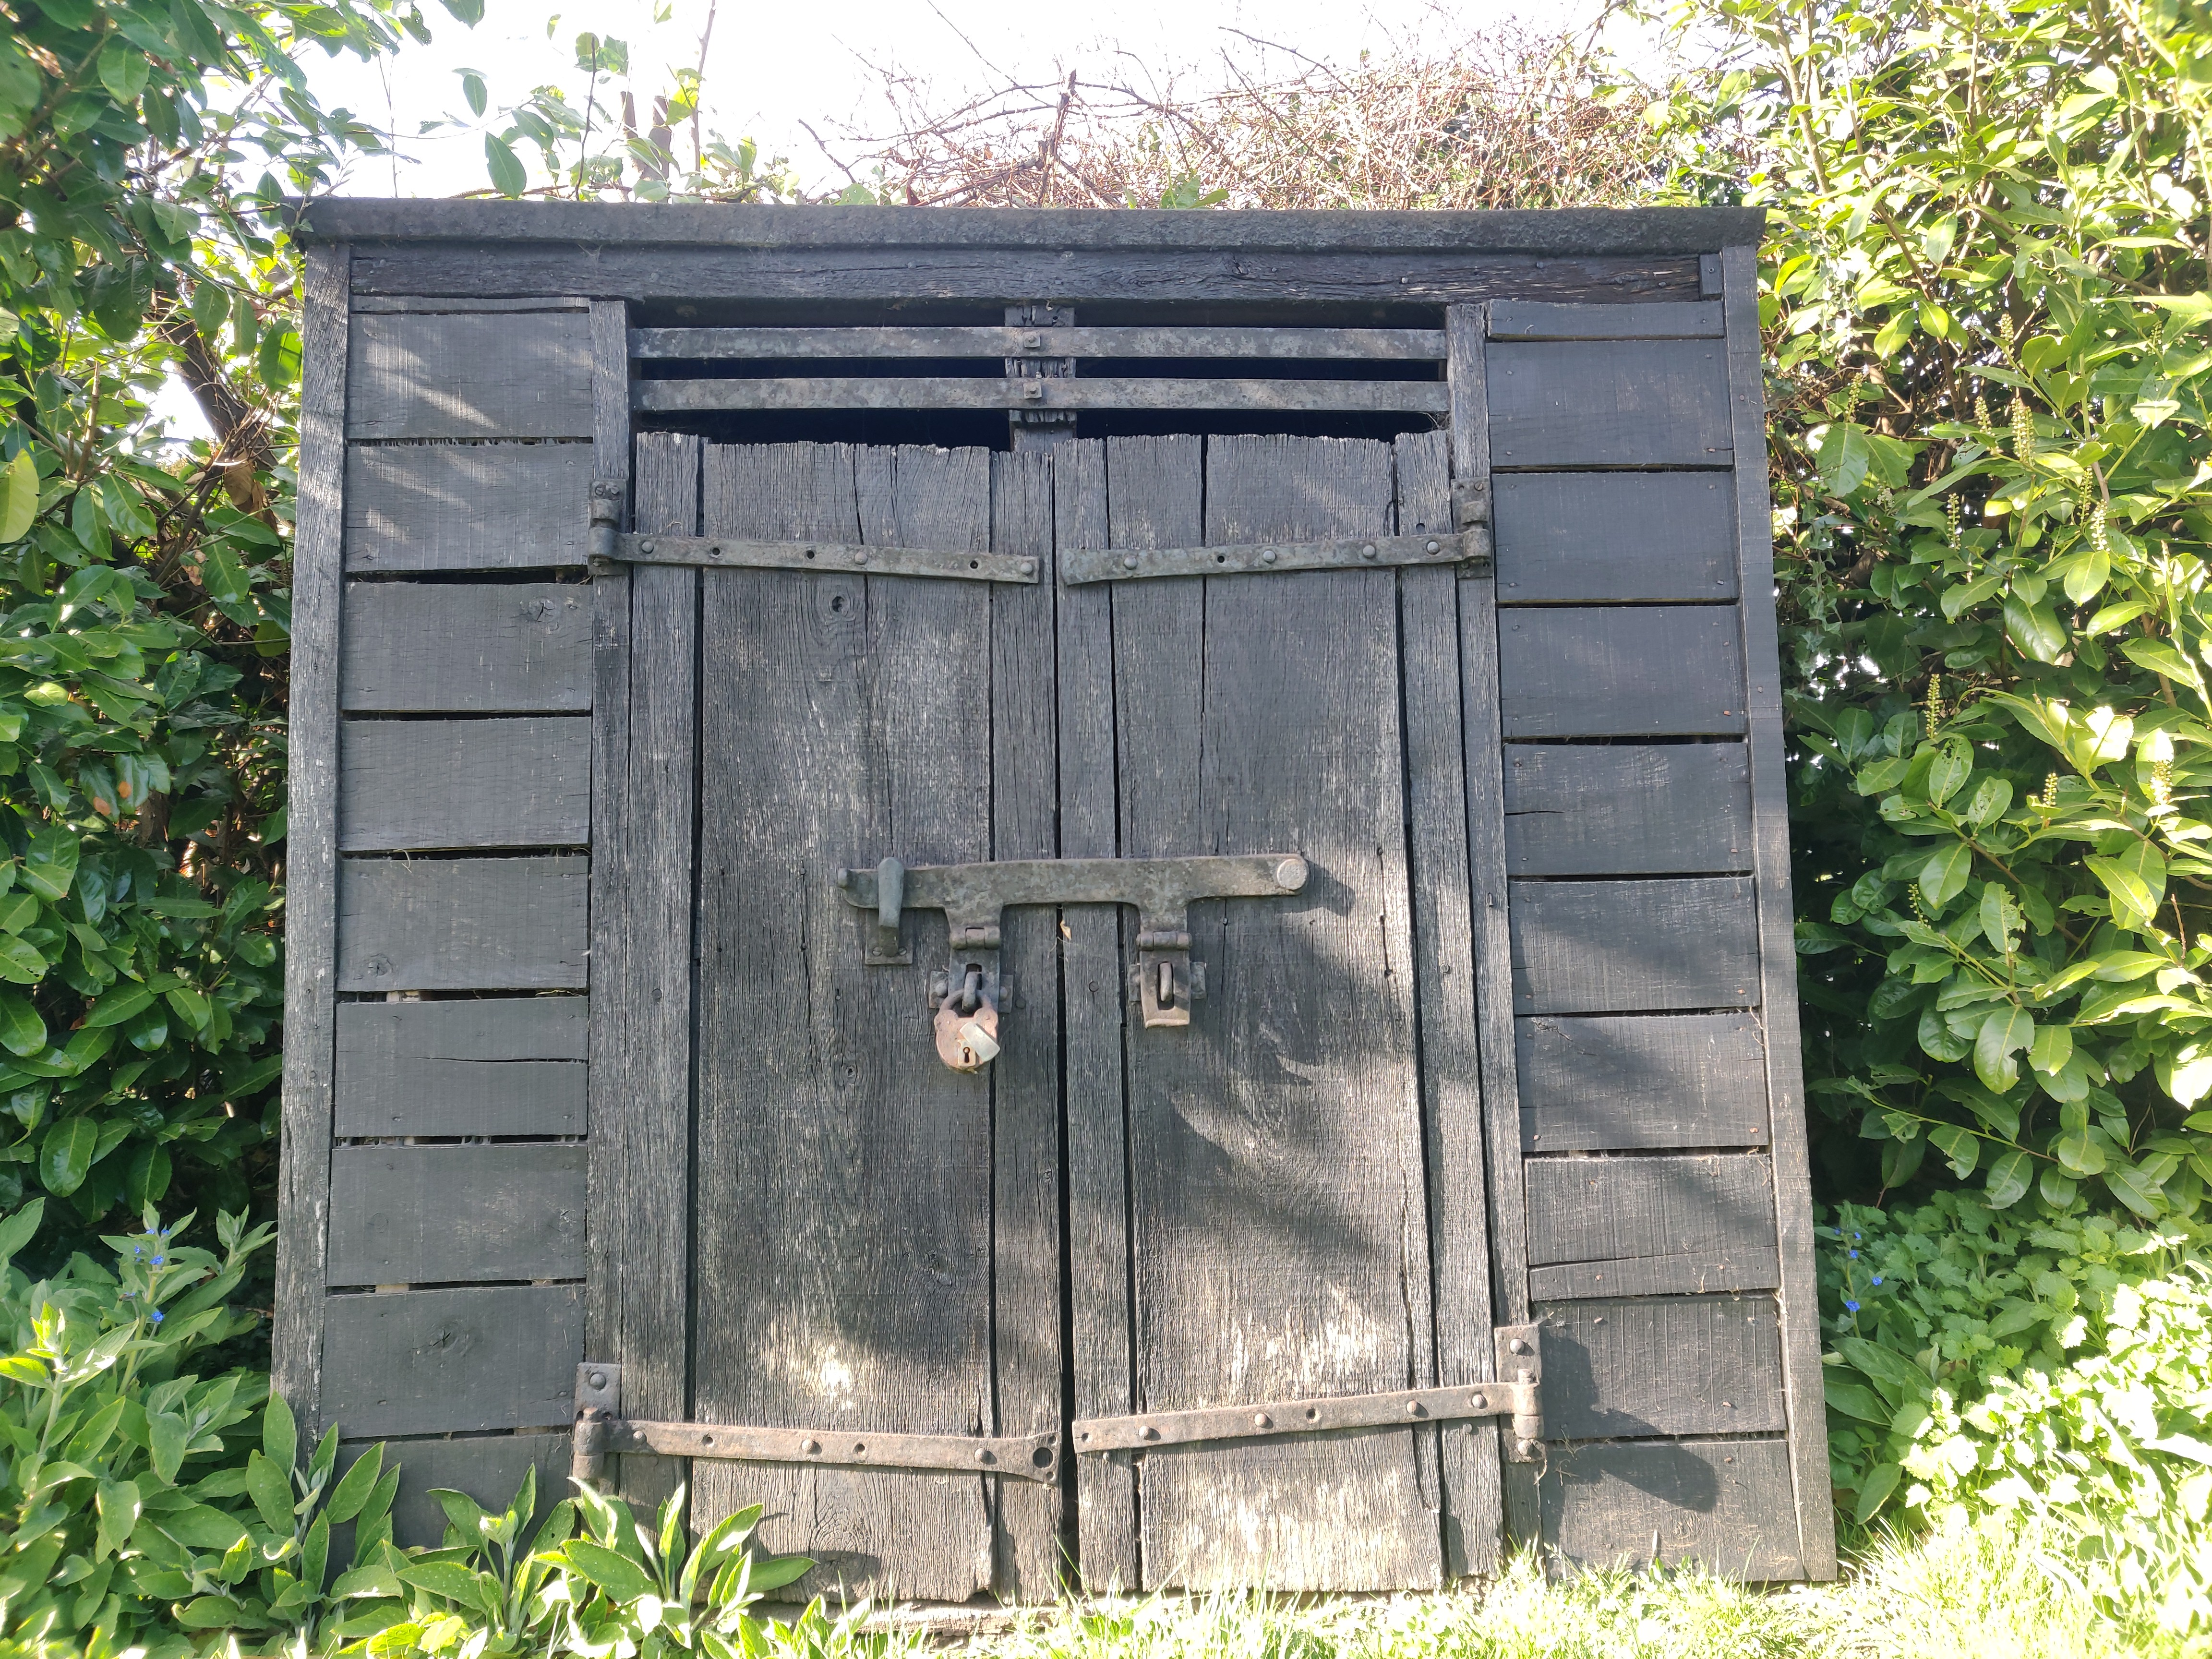 Next to the stocks is the village lockup, which looks like a small wooden shed. Apparently this is where in former times criminals were held until they could be brought before the magistrate.
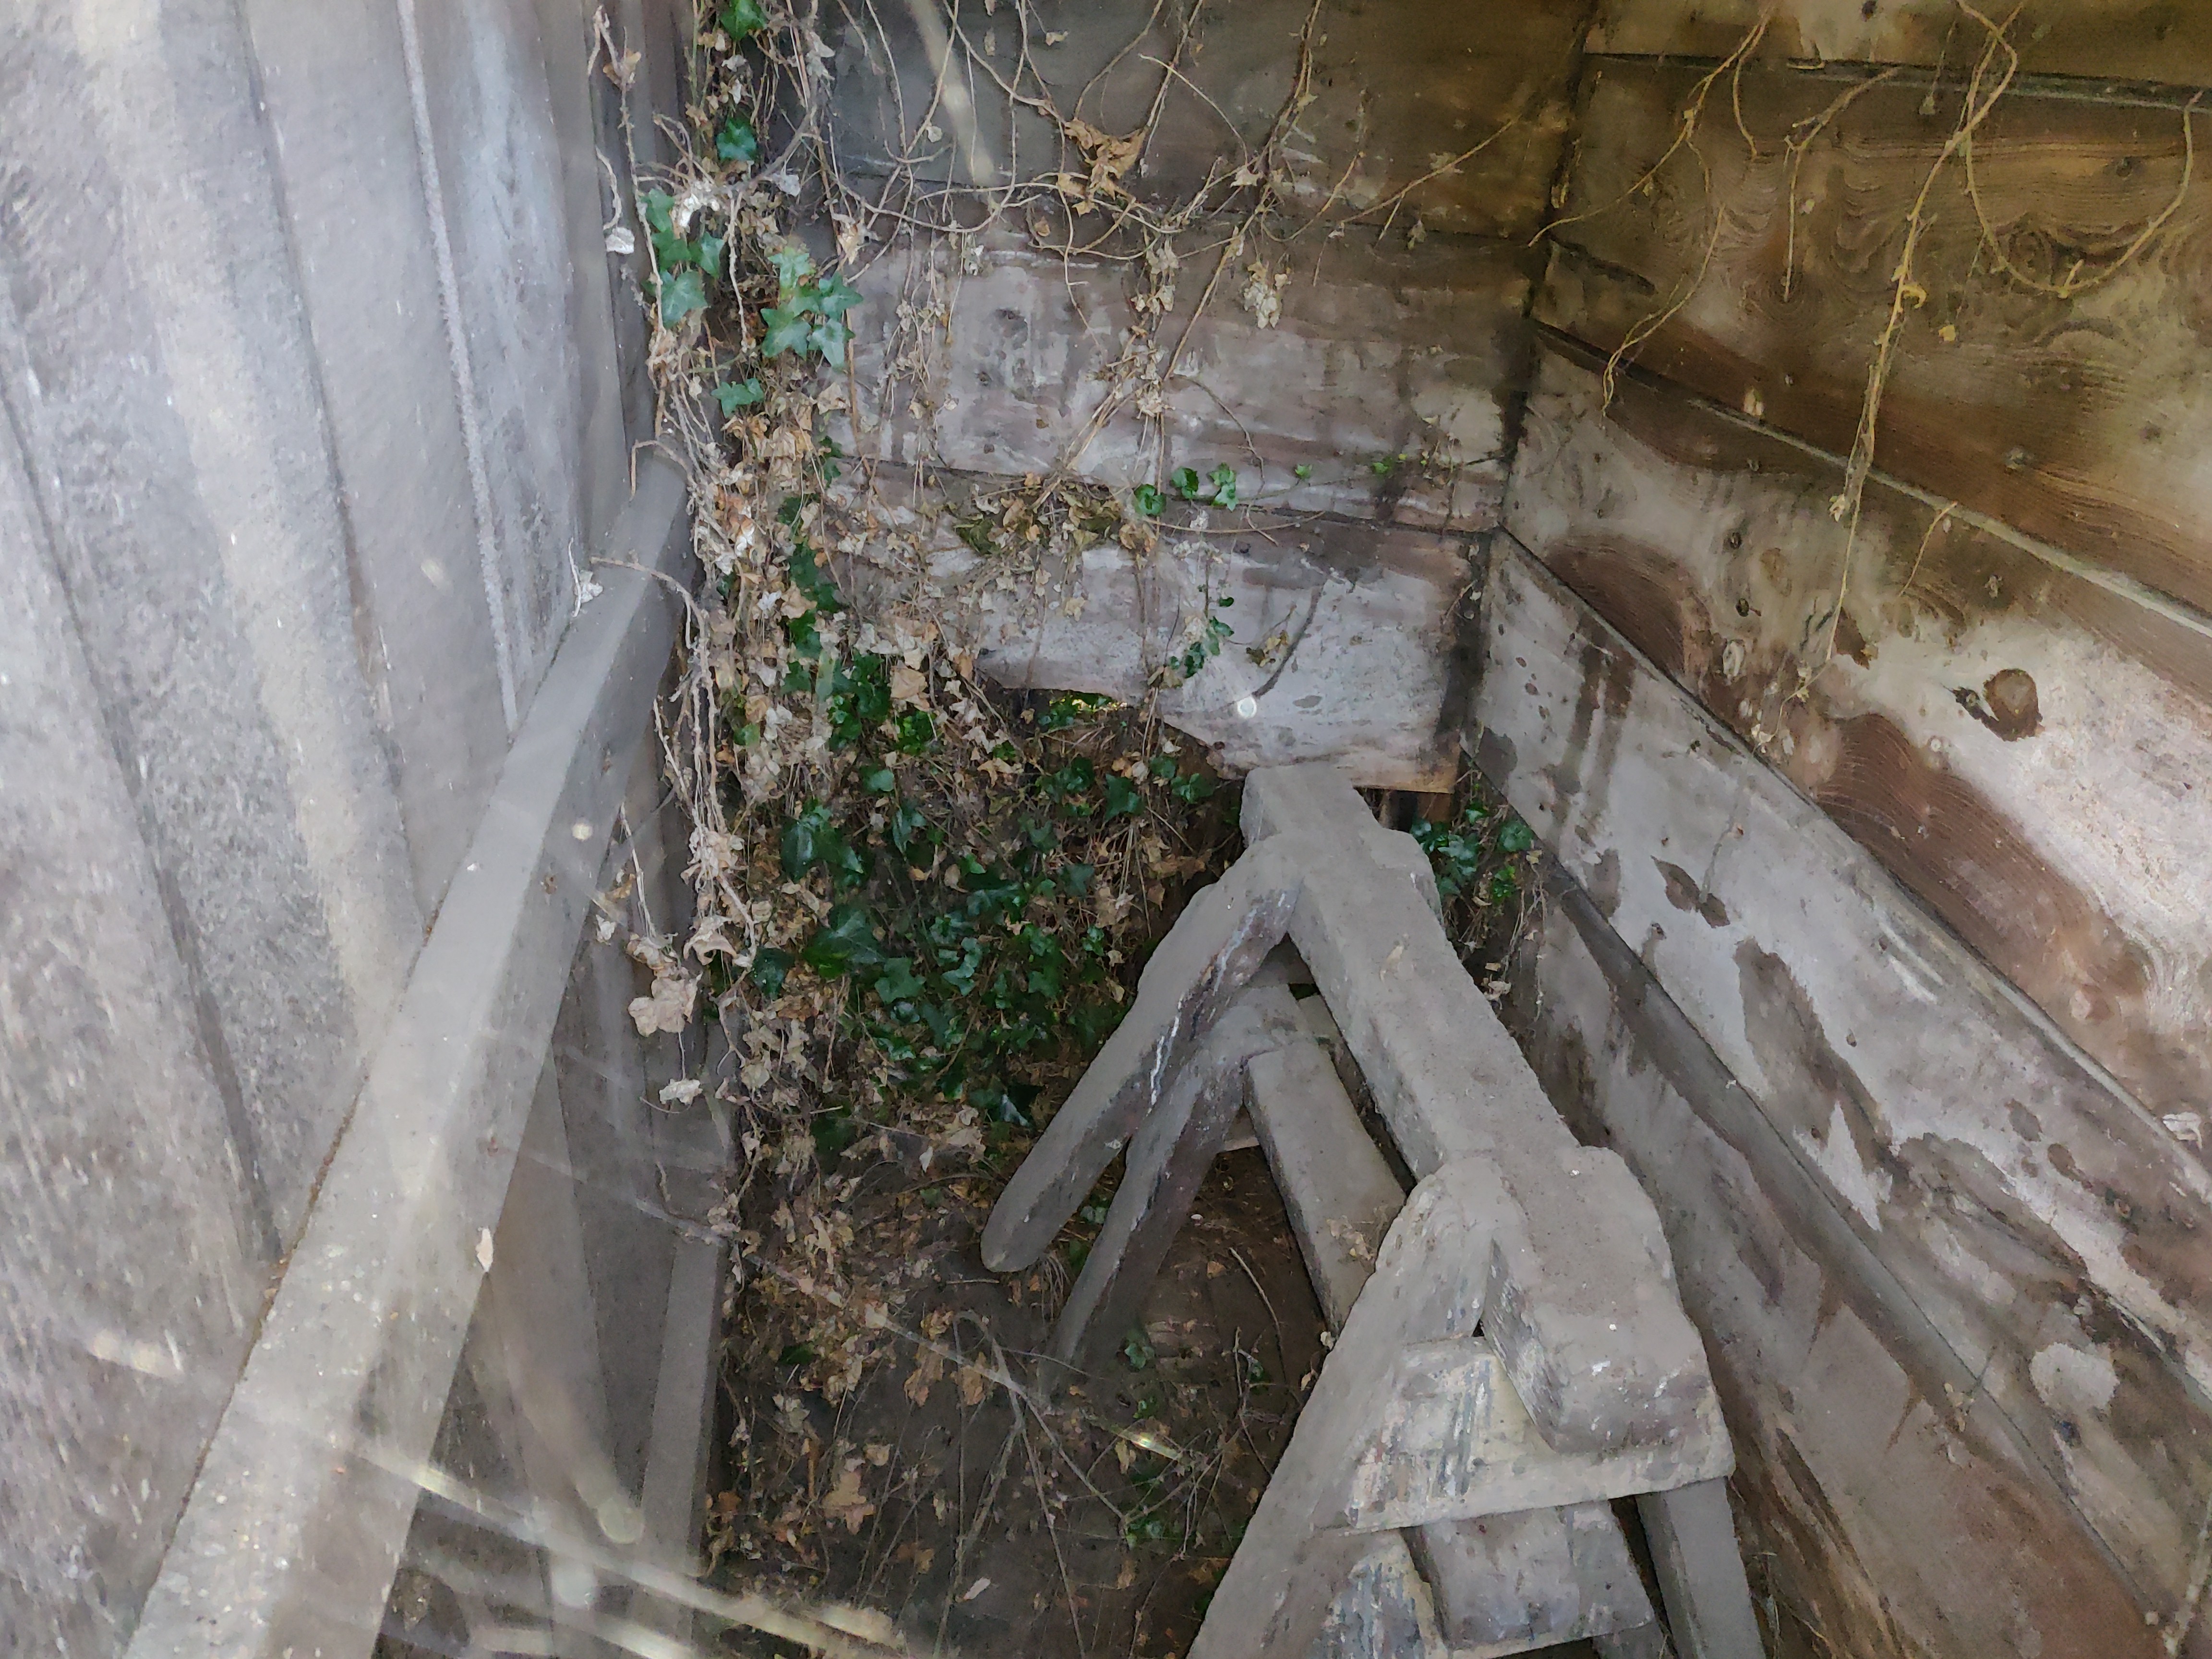 I did try for a photo of the inside, but I don't really know what I'm looking at here. Its possible that the low height is because it was partly set into the ground, but its equally as possible that the floor has rotted away and been removed
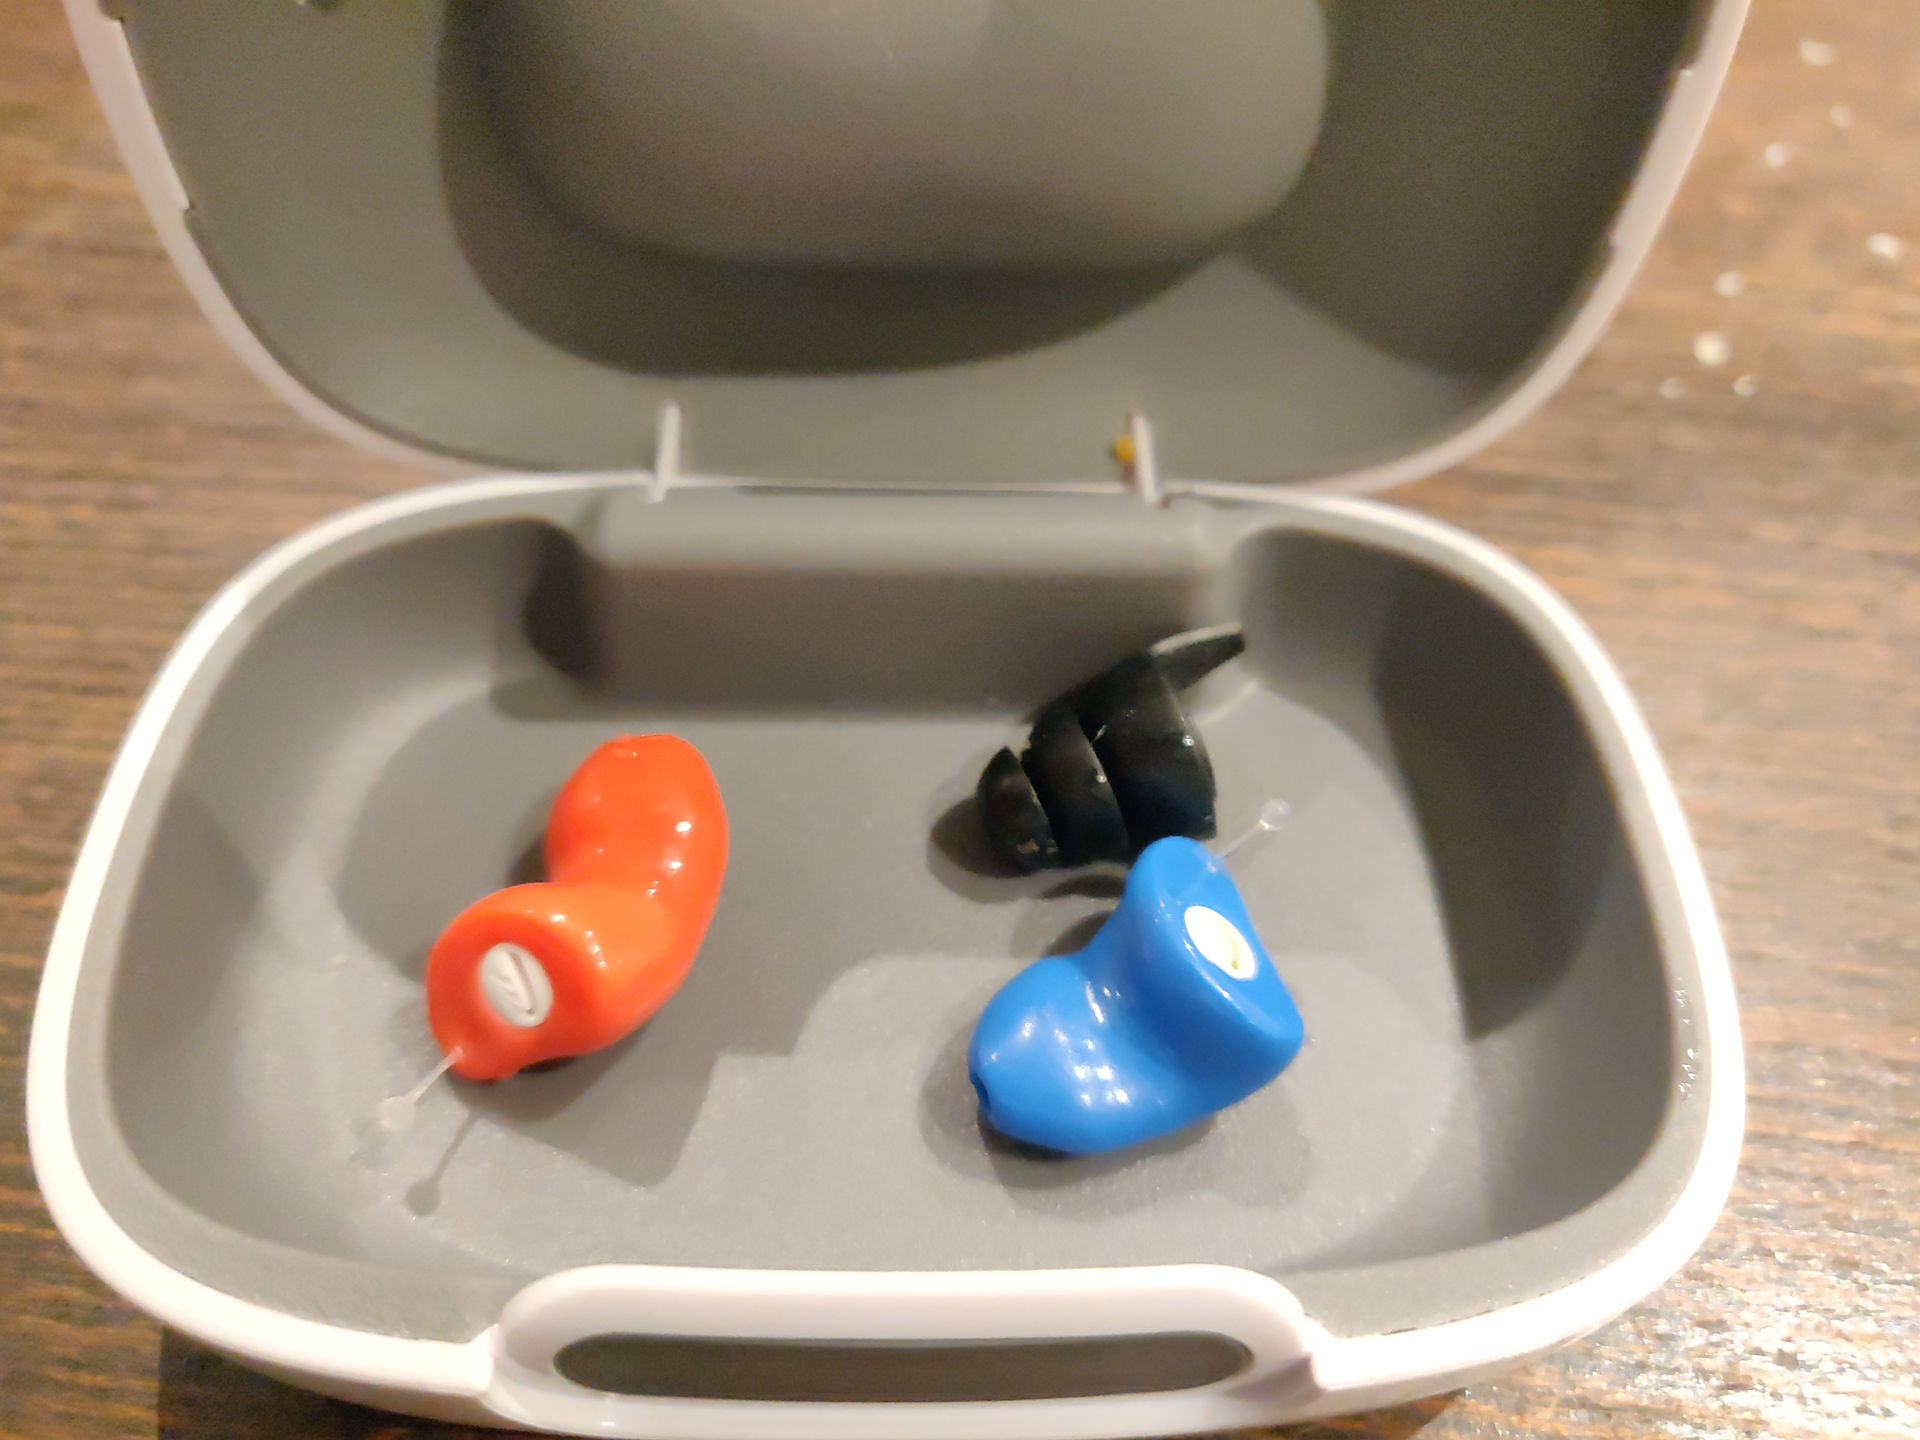 "What big ears you have"
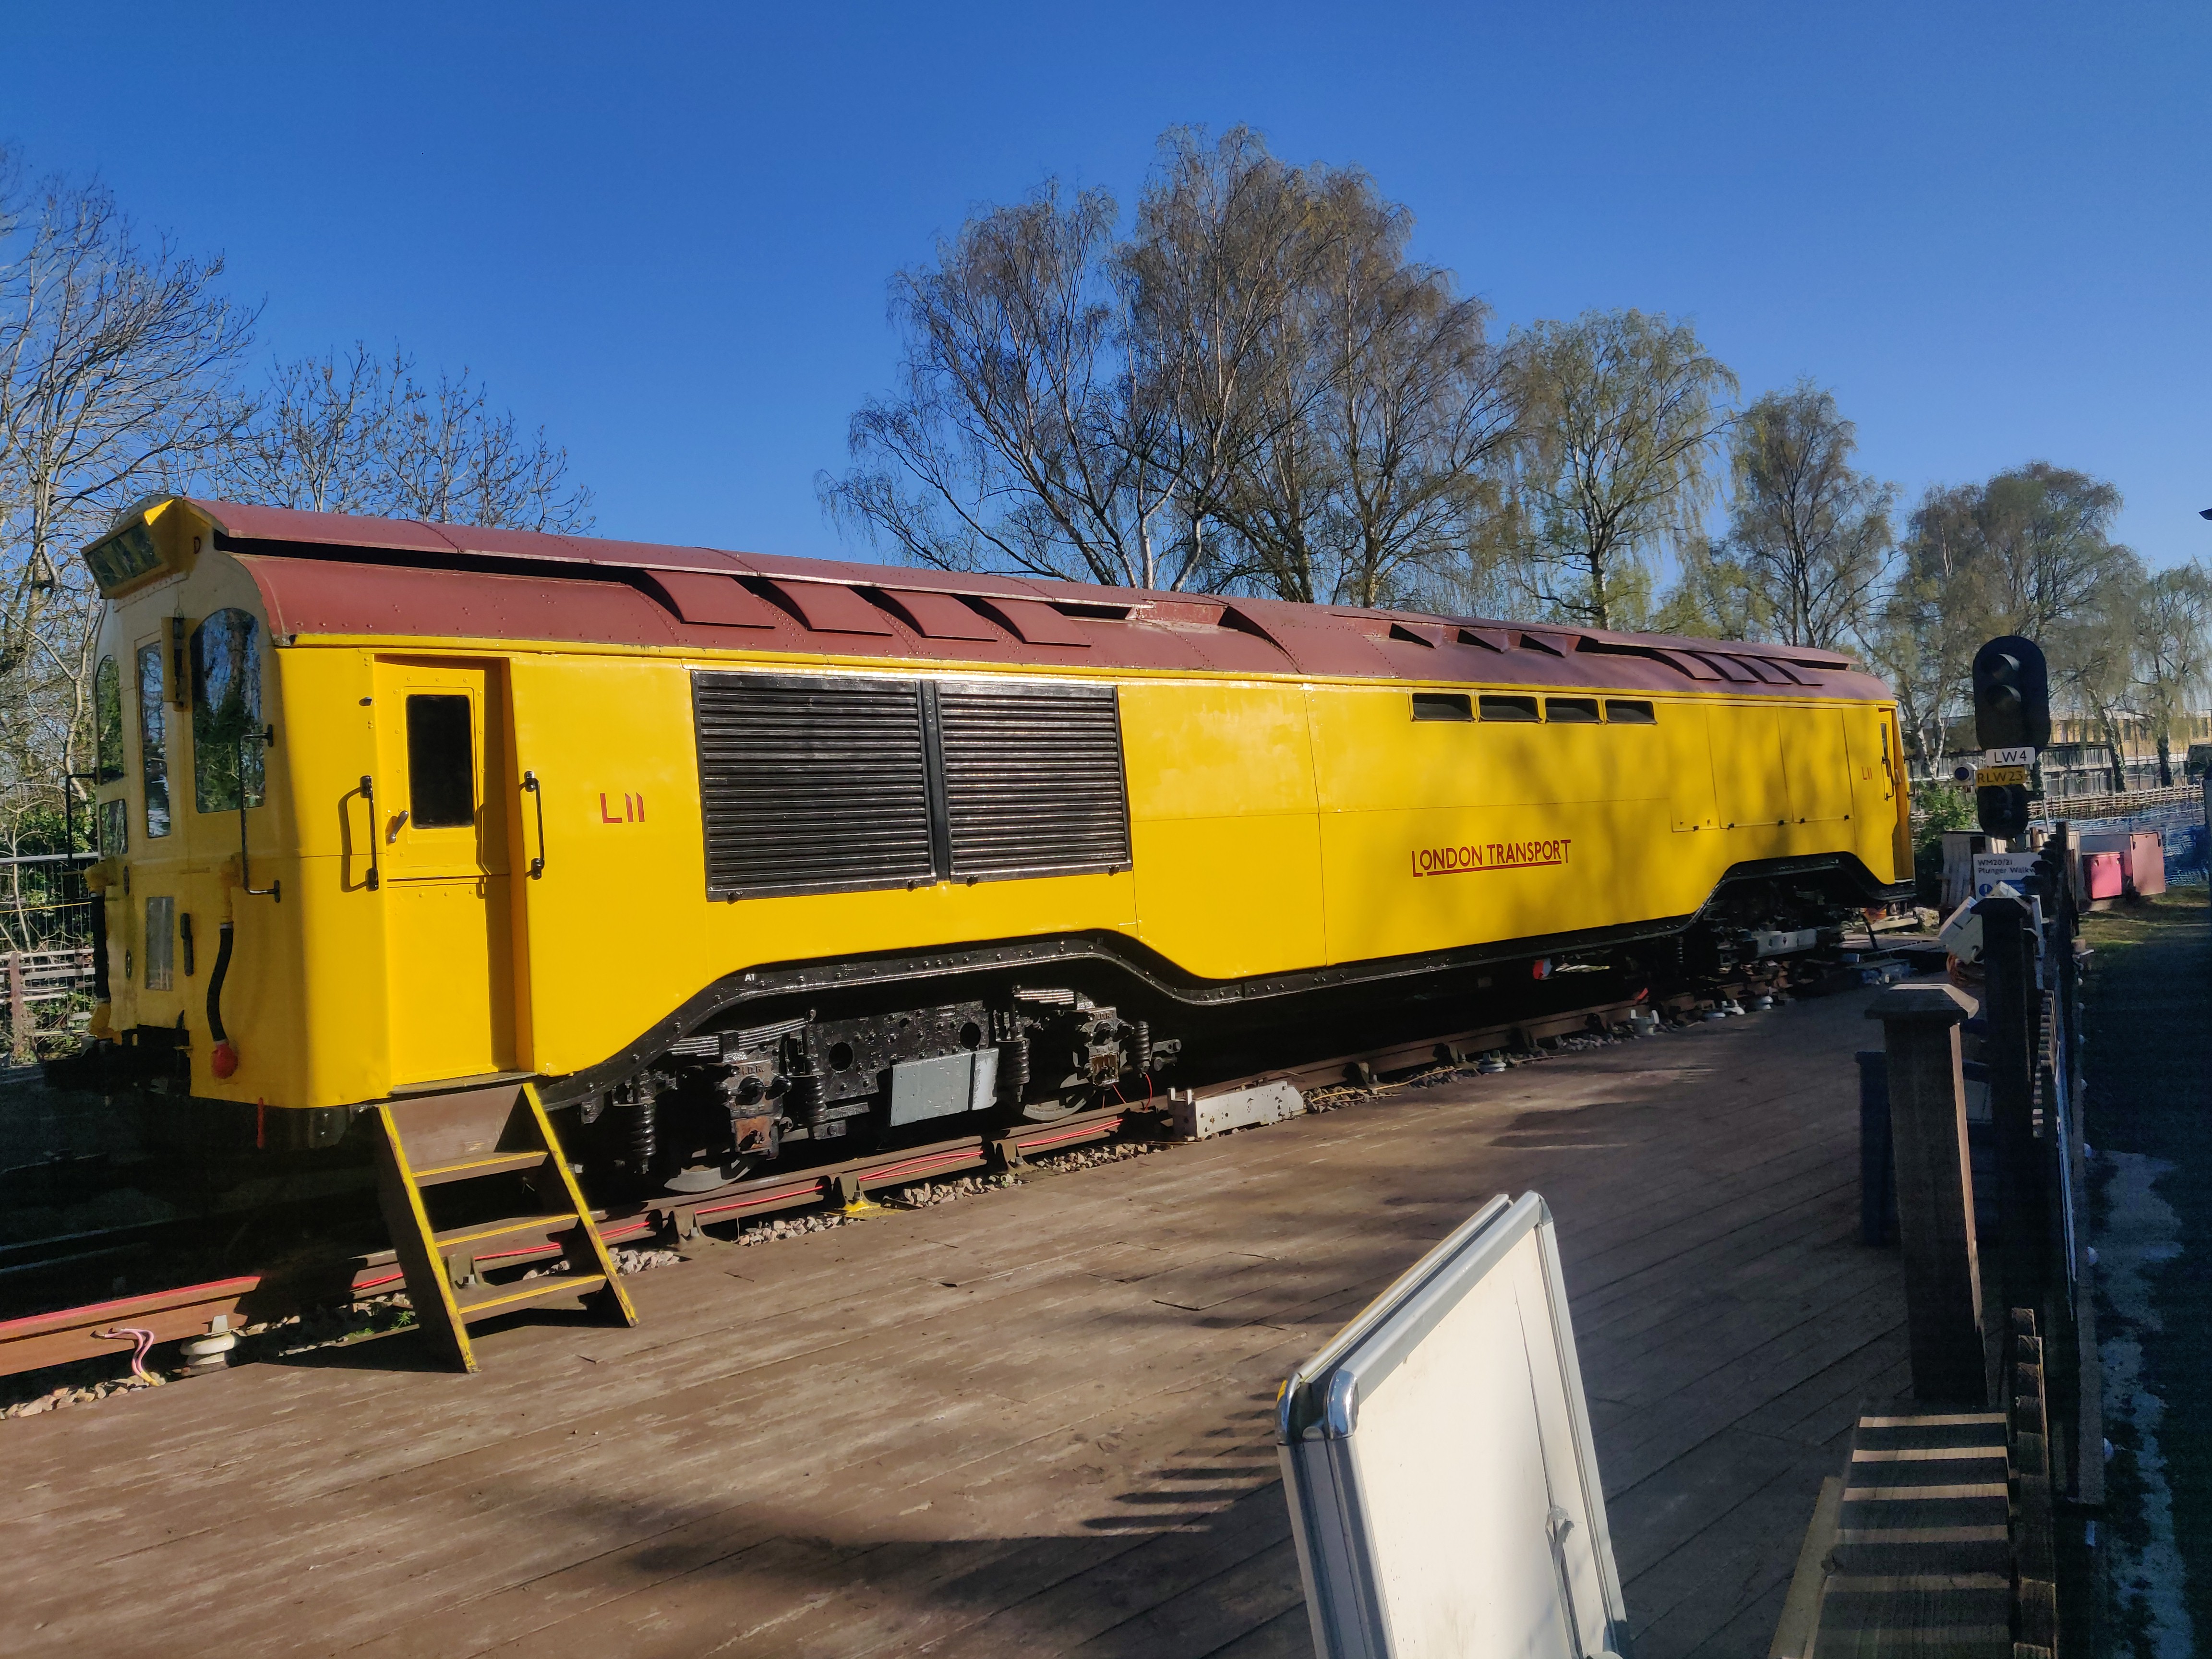 T is for Train. This bright yellow engine was used in the London Underground works at Acton as a shunter to push dead trains up and down the hill. It's made of two Piccadilly Line locomotives welded together (and a number of "bits box" parts making it a quite unusual artifact) and now lives at the Epping Signalling Museum
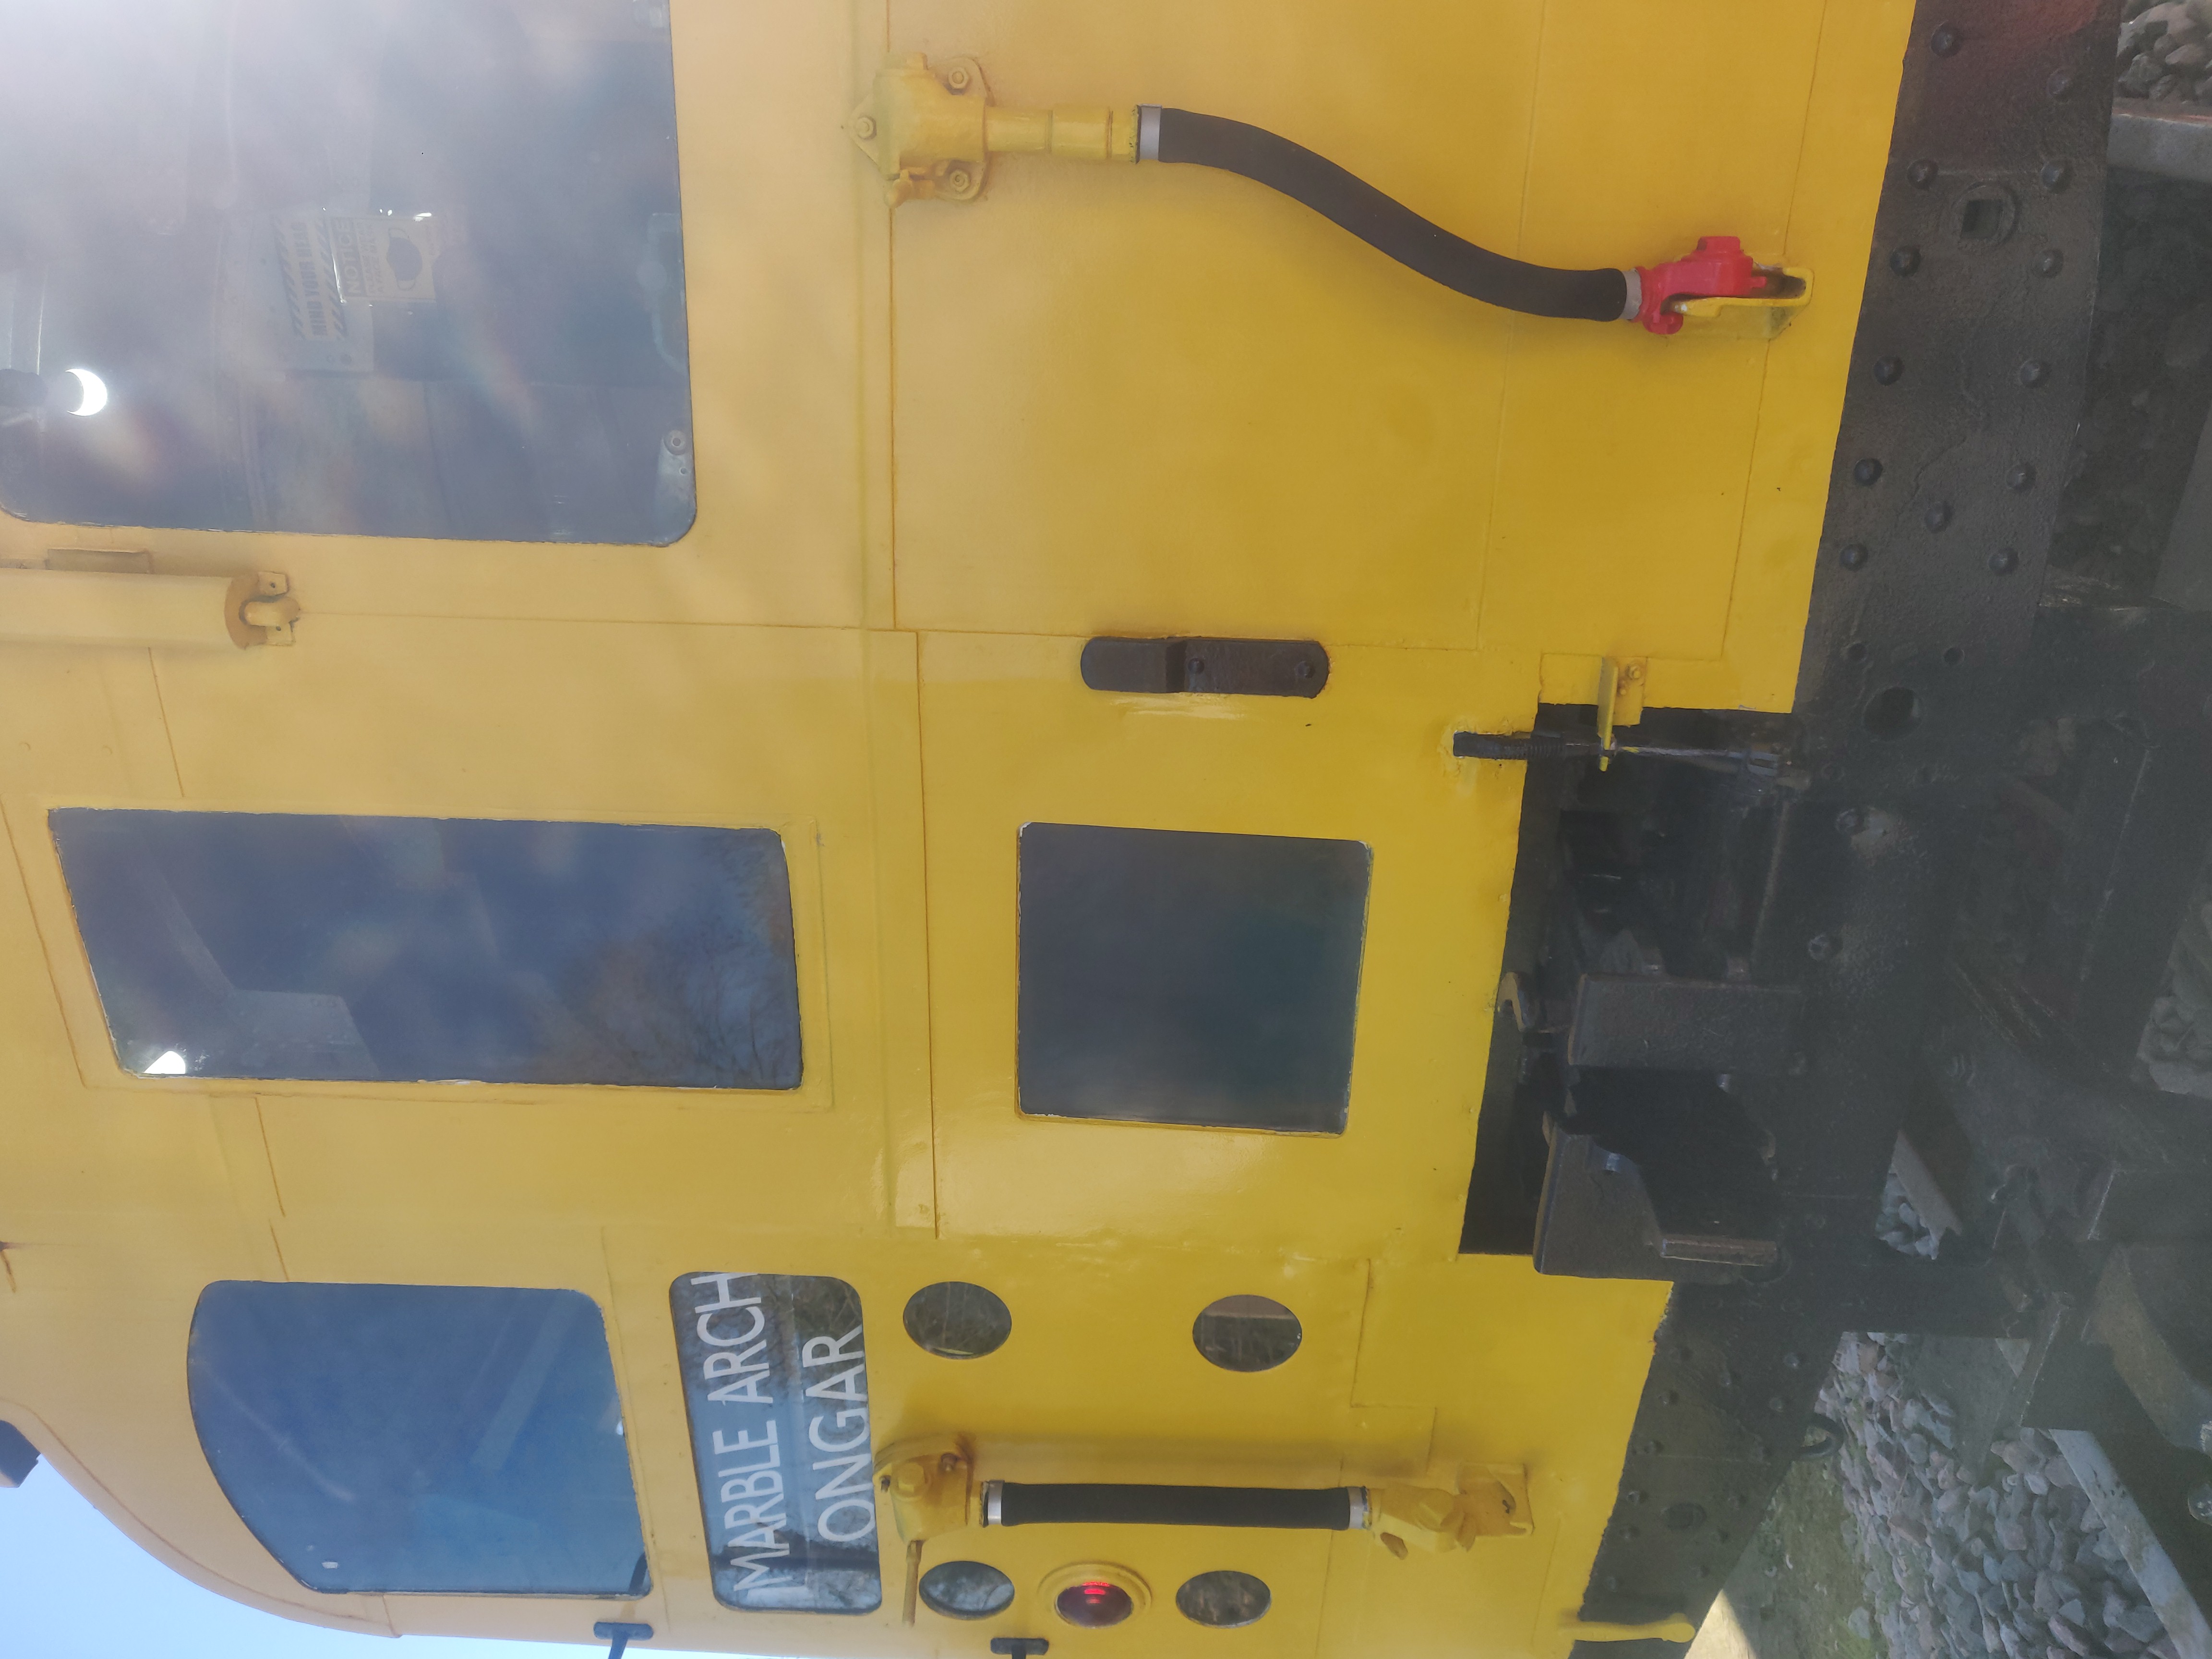 This is the view from one end: in the middle at the bottom you can see two sets of couplers so that it could be used with both tube and surface trains. The door was welded shut so that the driver was not tempted to open it/lean out/fall out while attaching to the train, then a glass pane set into it so that he could still see what he was doing.
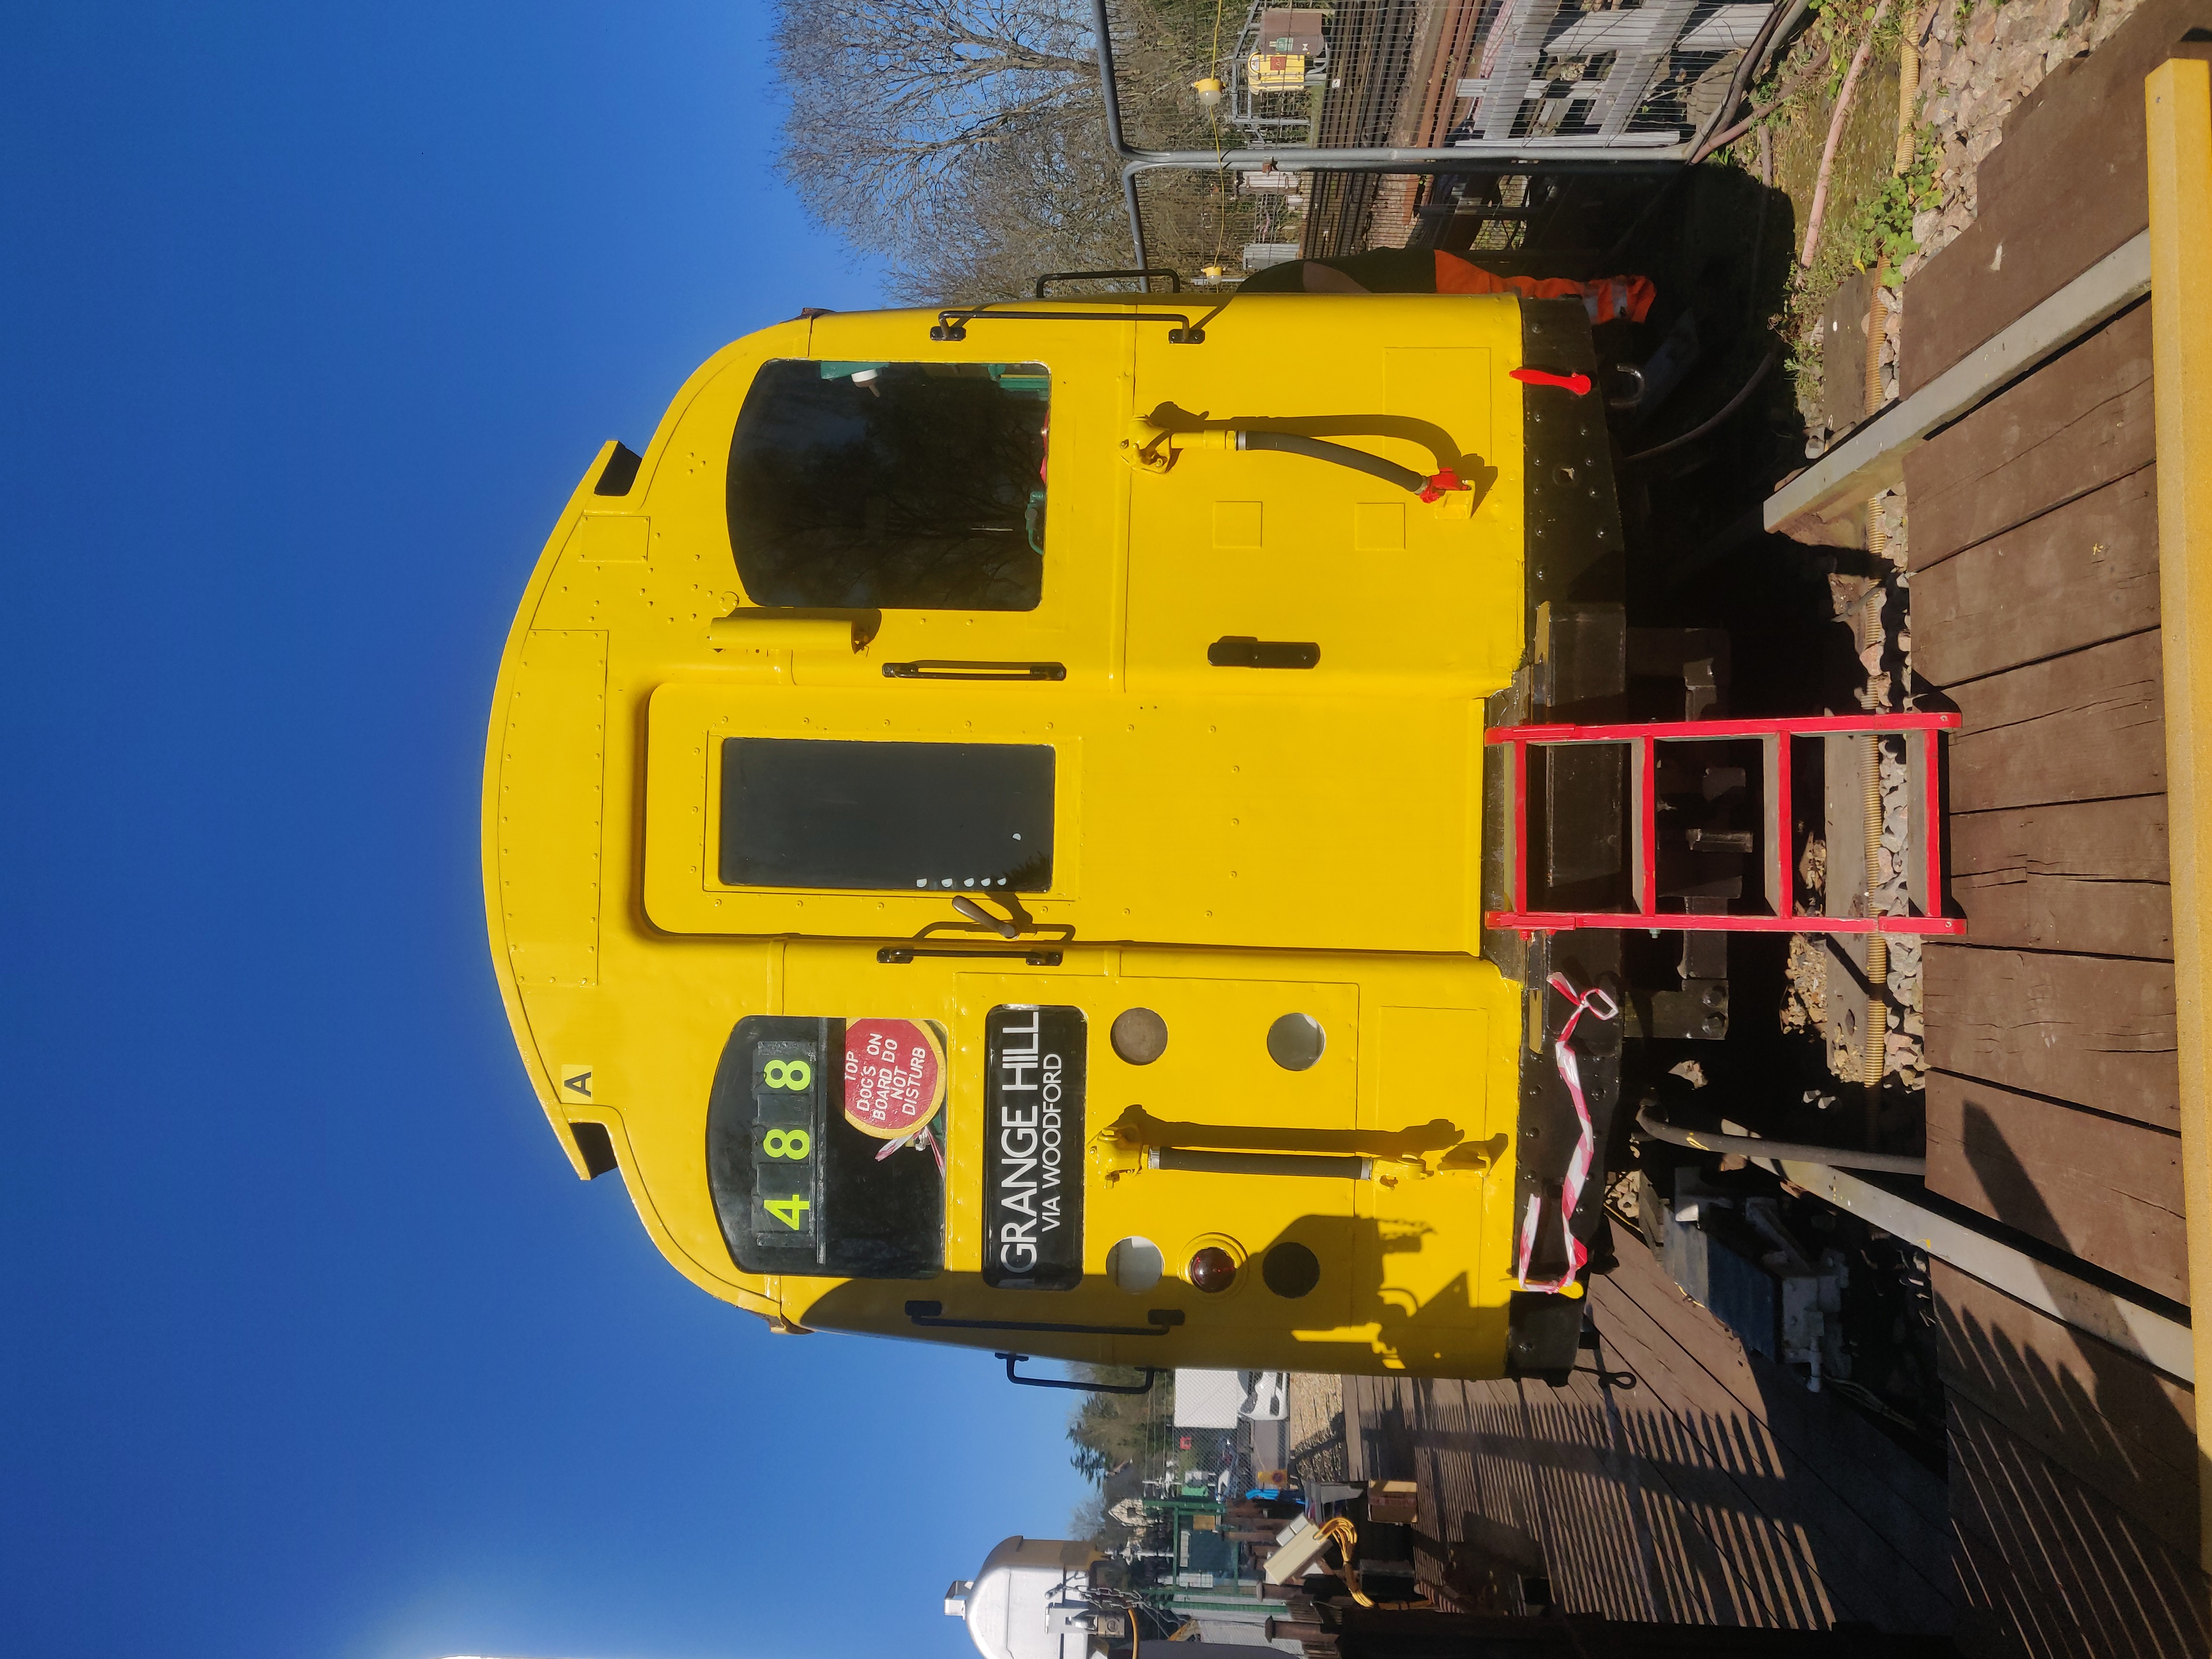 The other end looks more like a normal tube train cab (and the door opens), although still painted bright yellow.
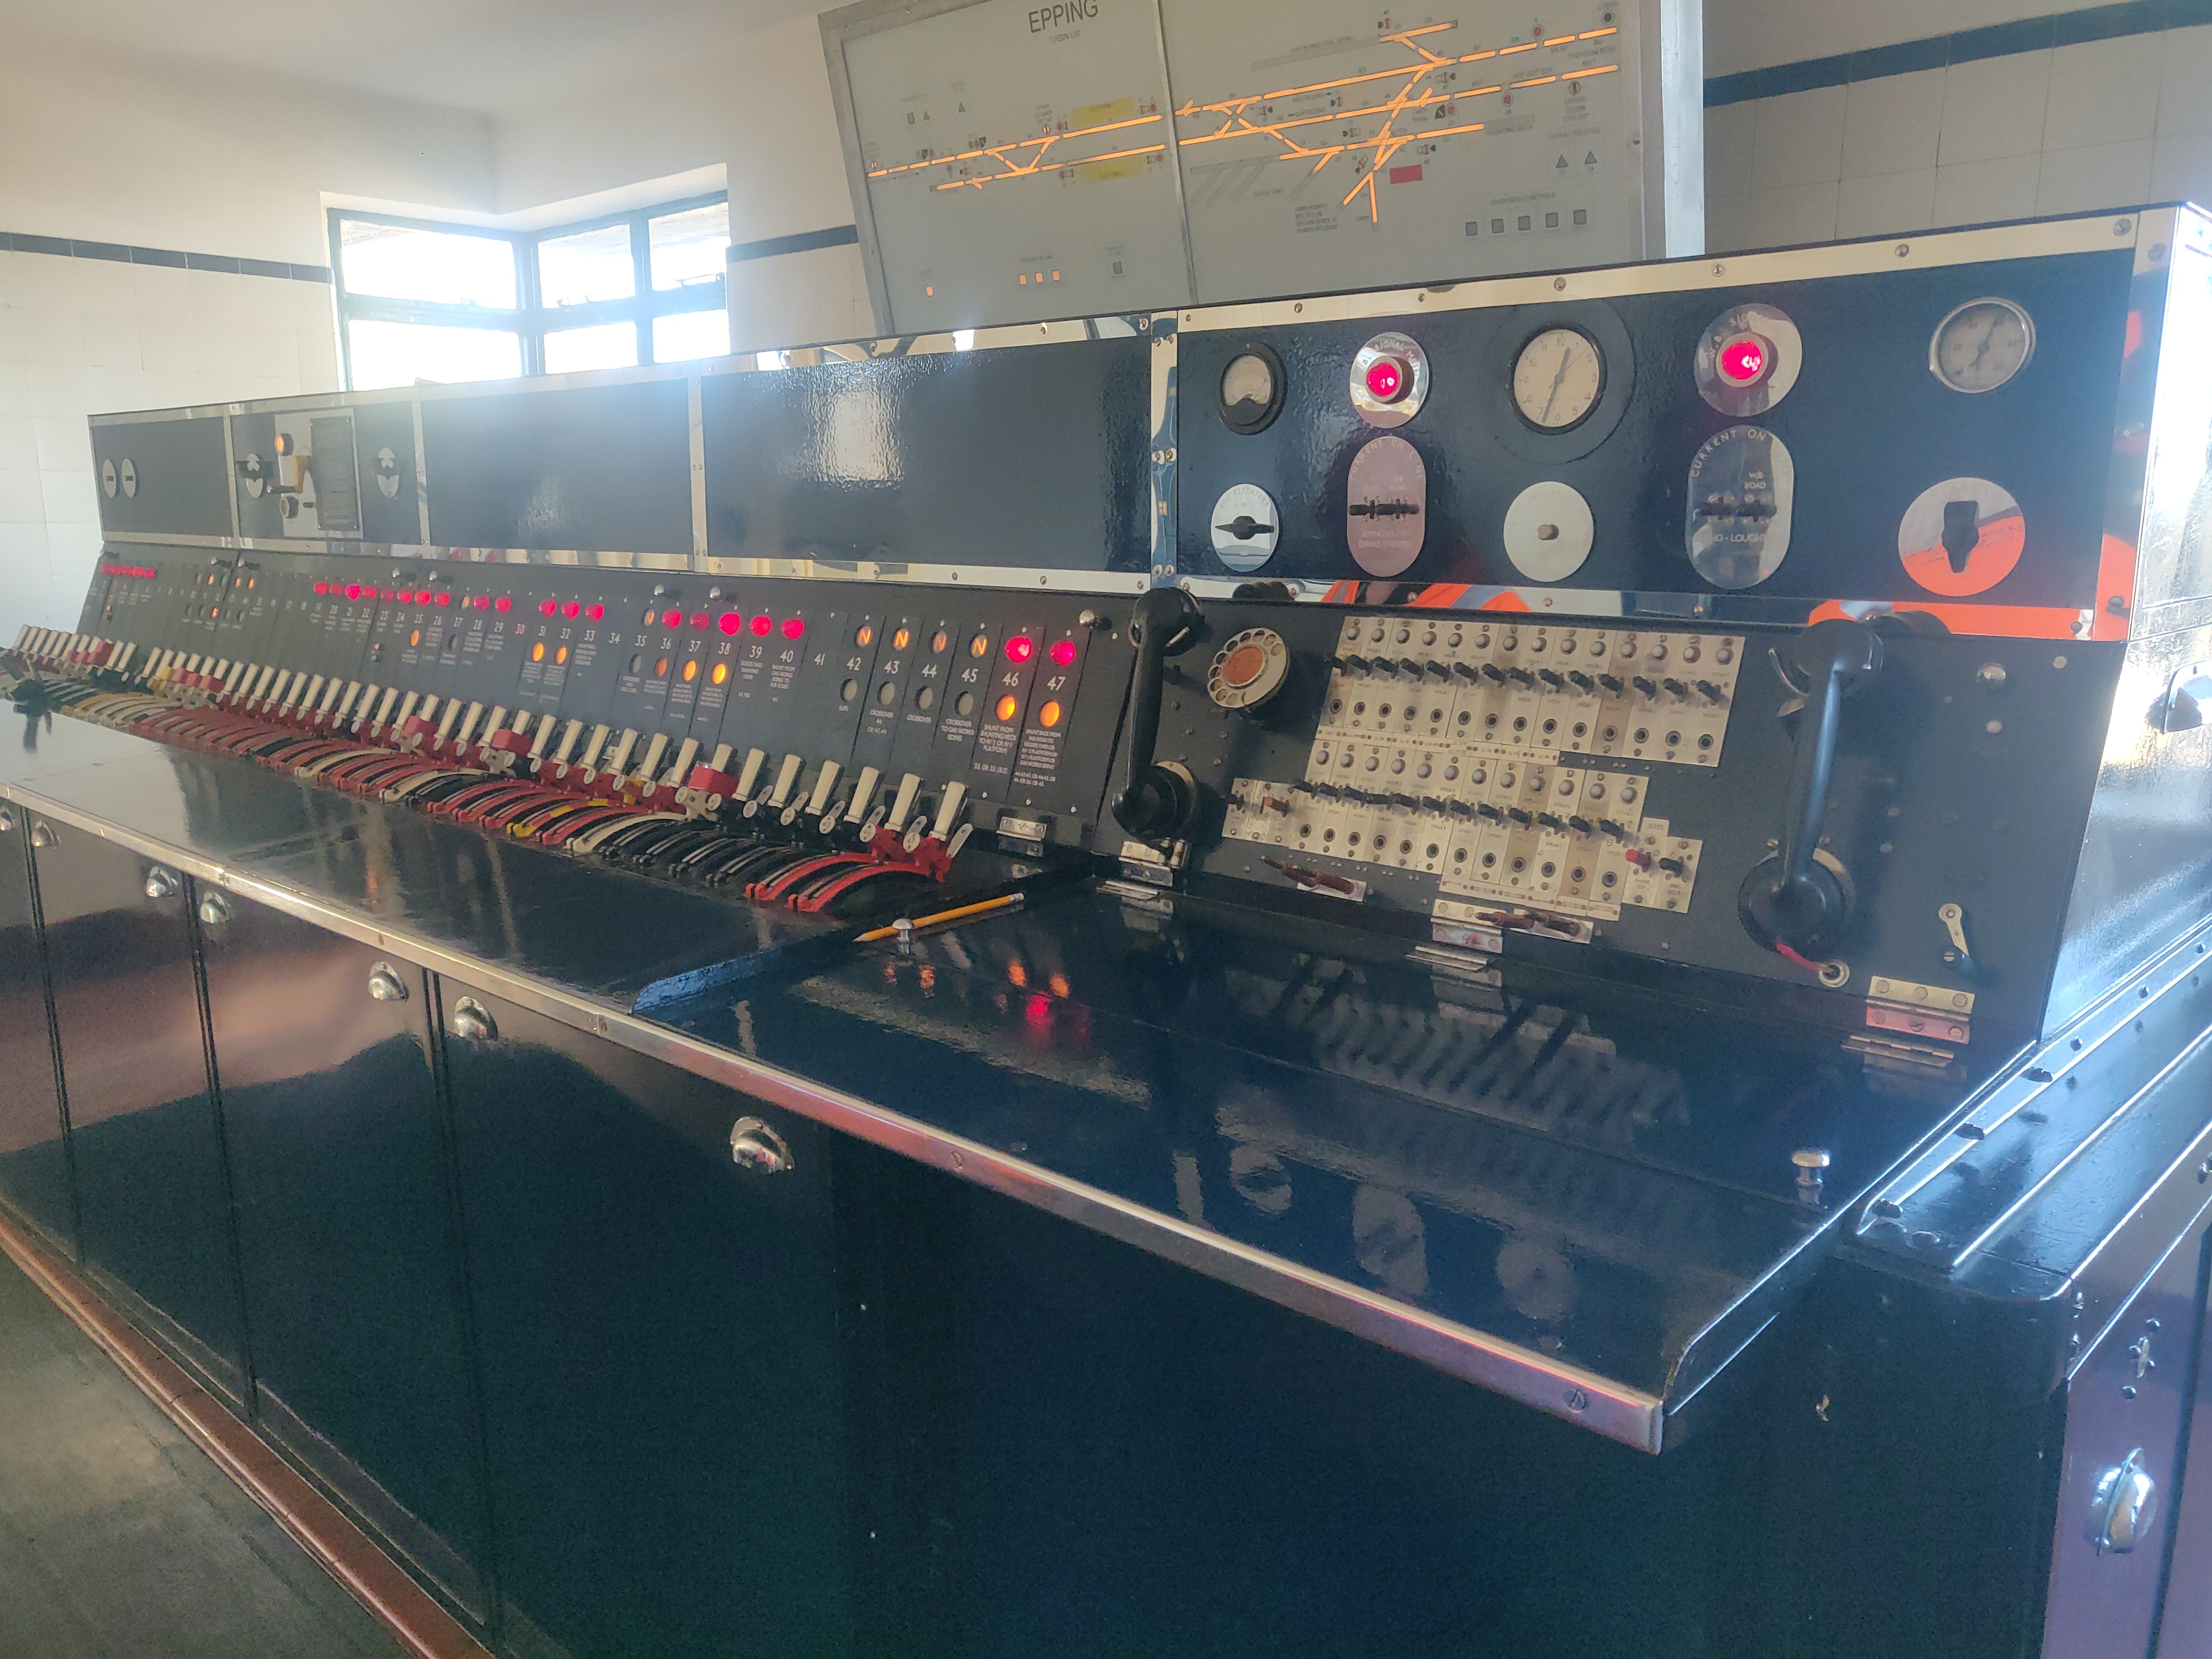 The rest of the museum is in the adjacent former signal cabin, including this restored signal frame with 47 levers. Epping was complicated to signal as it had passenger trains and also goods steam trains (longer stopping distances) for the brick works and gas works which also used to be here.
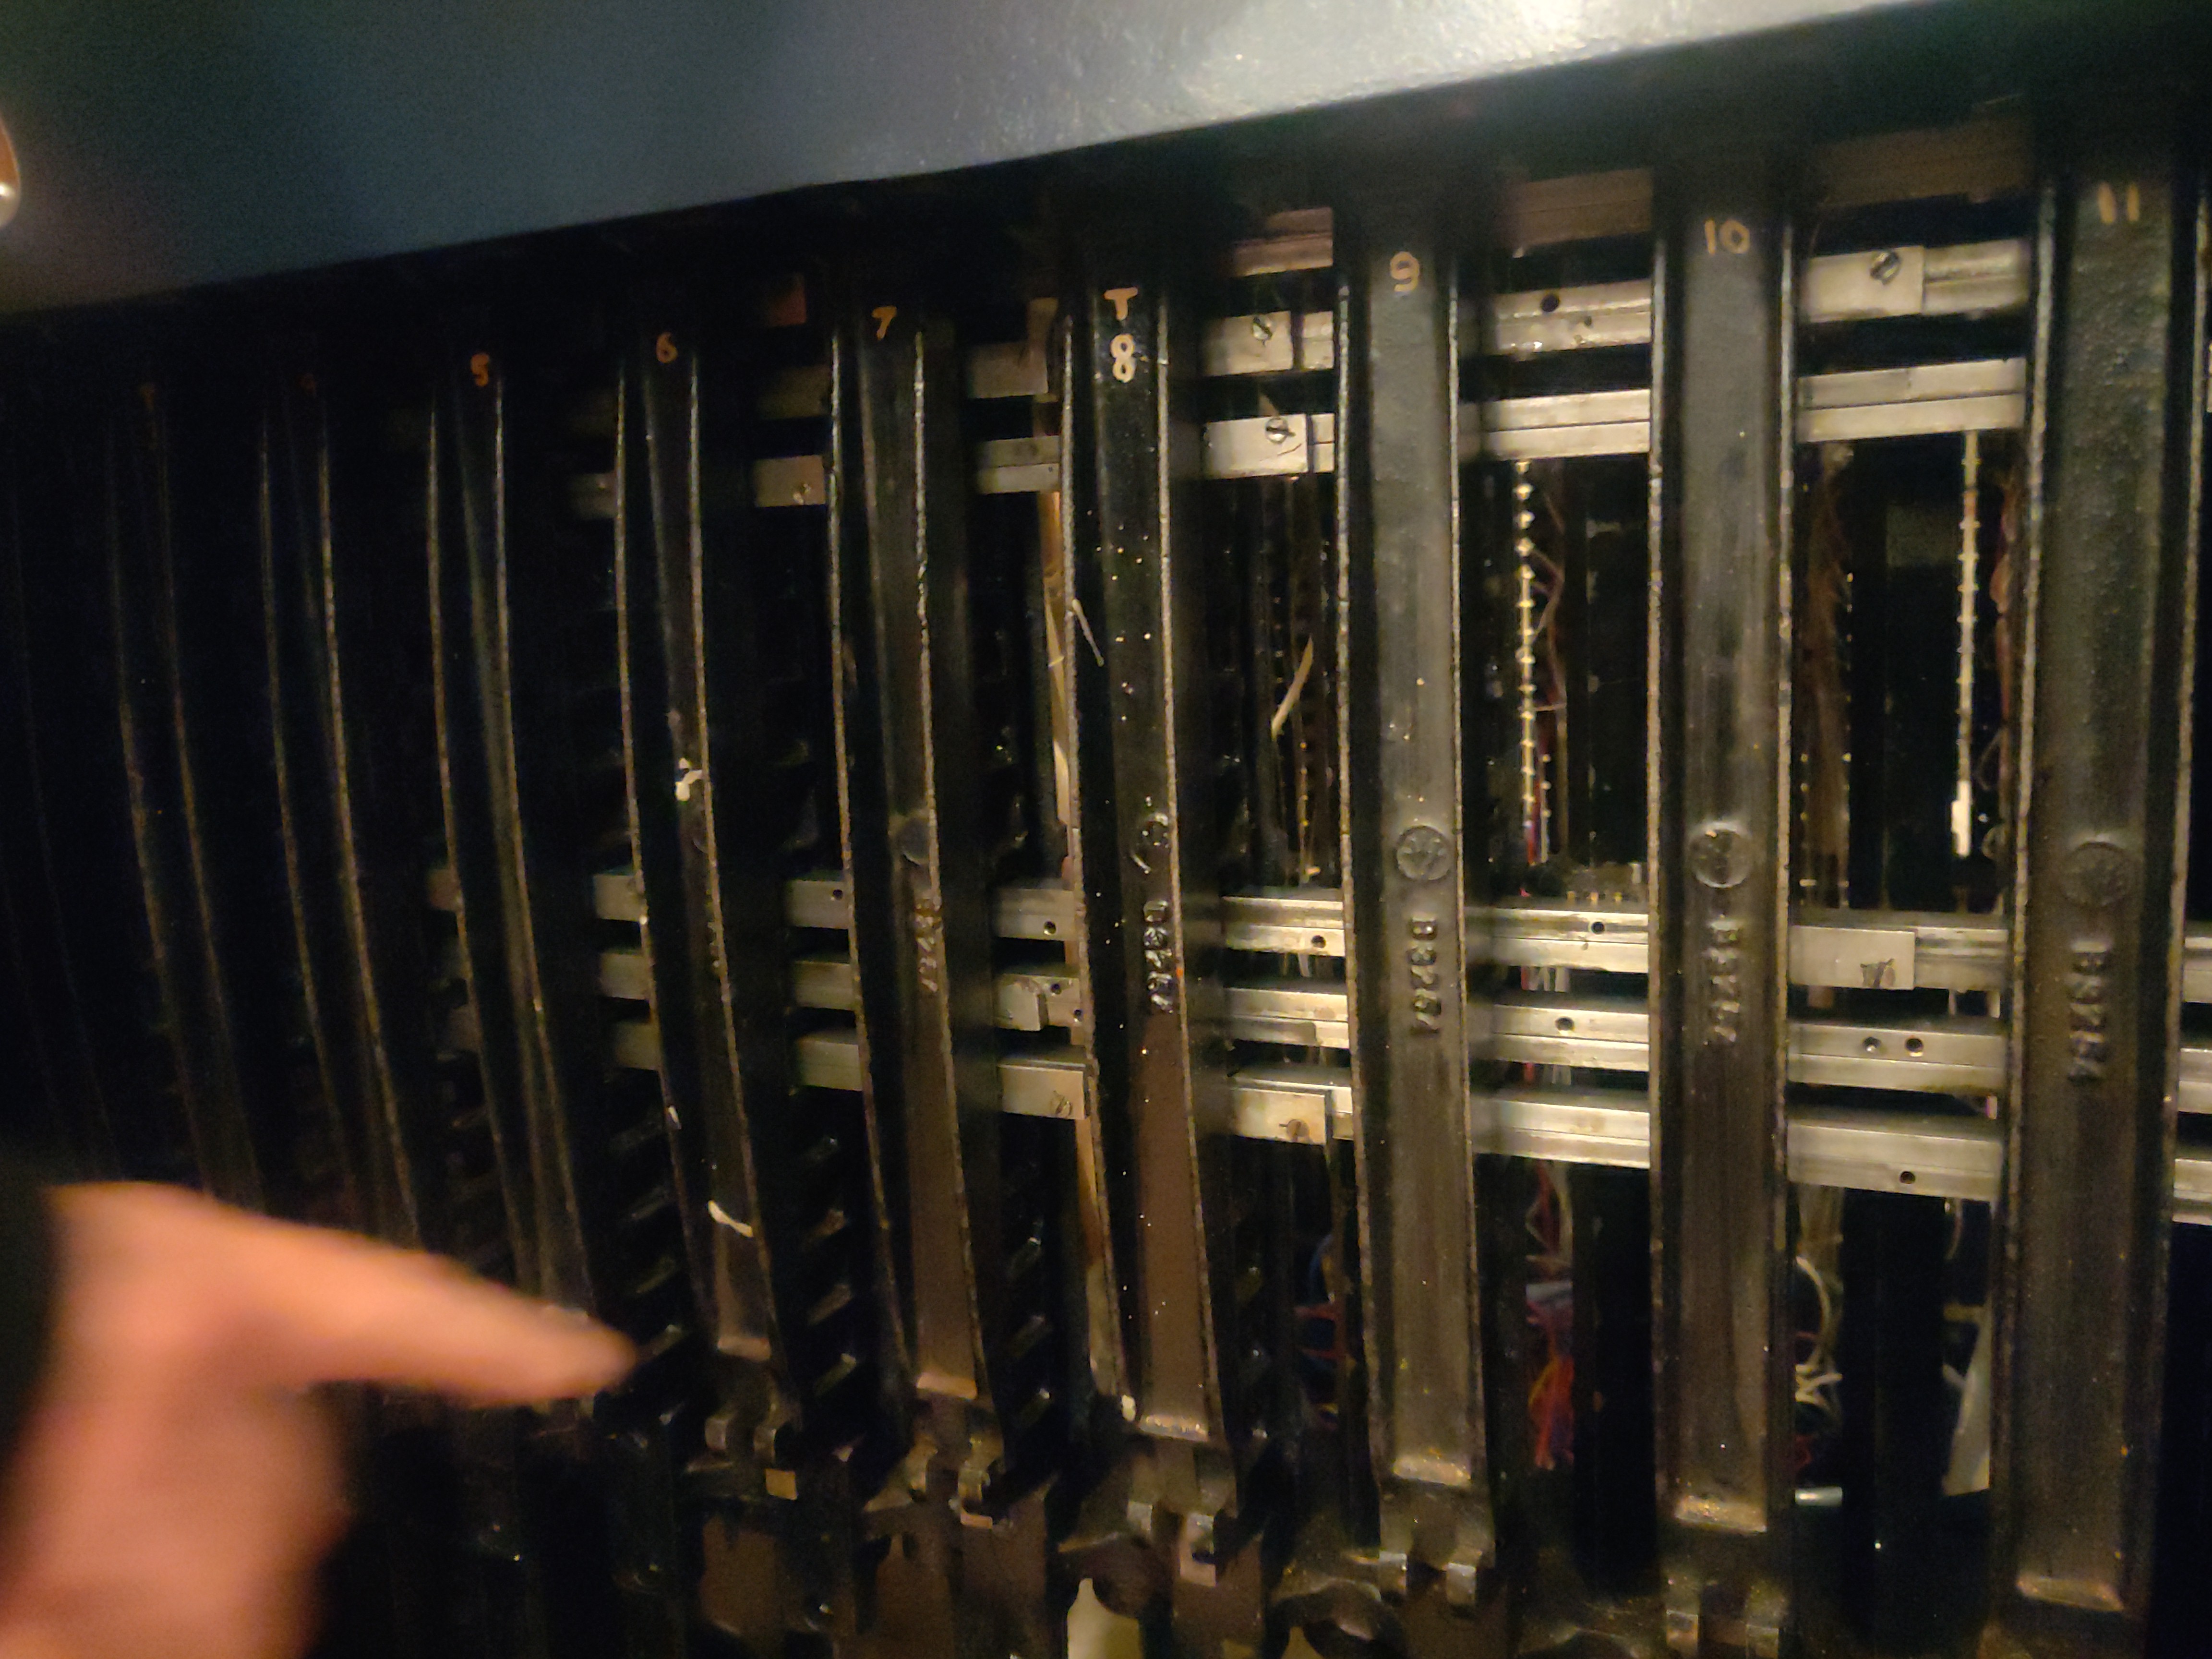 A signal frame seen from underneath. Some of the bits go side to to side when the levers are thrown, and this causes other bits to be prevented from going side to side. I think. Boolean logic in hardware.
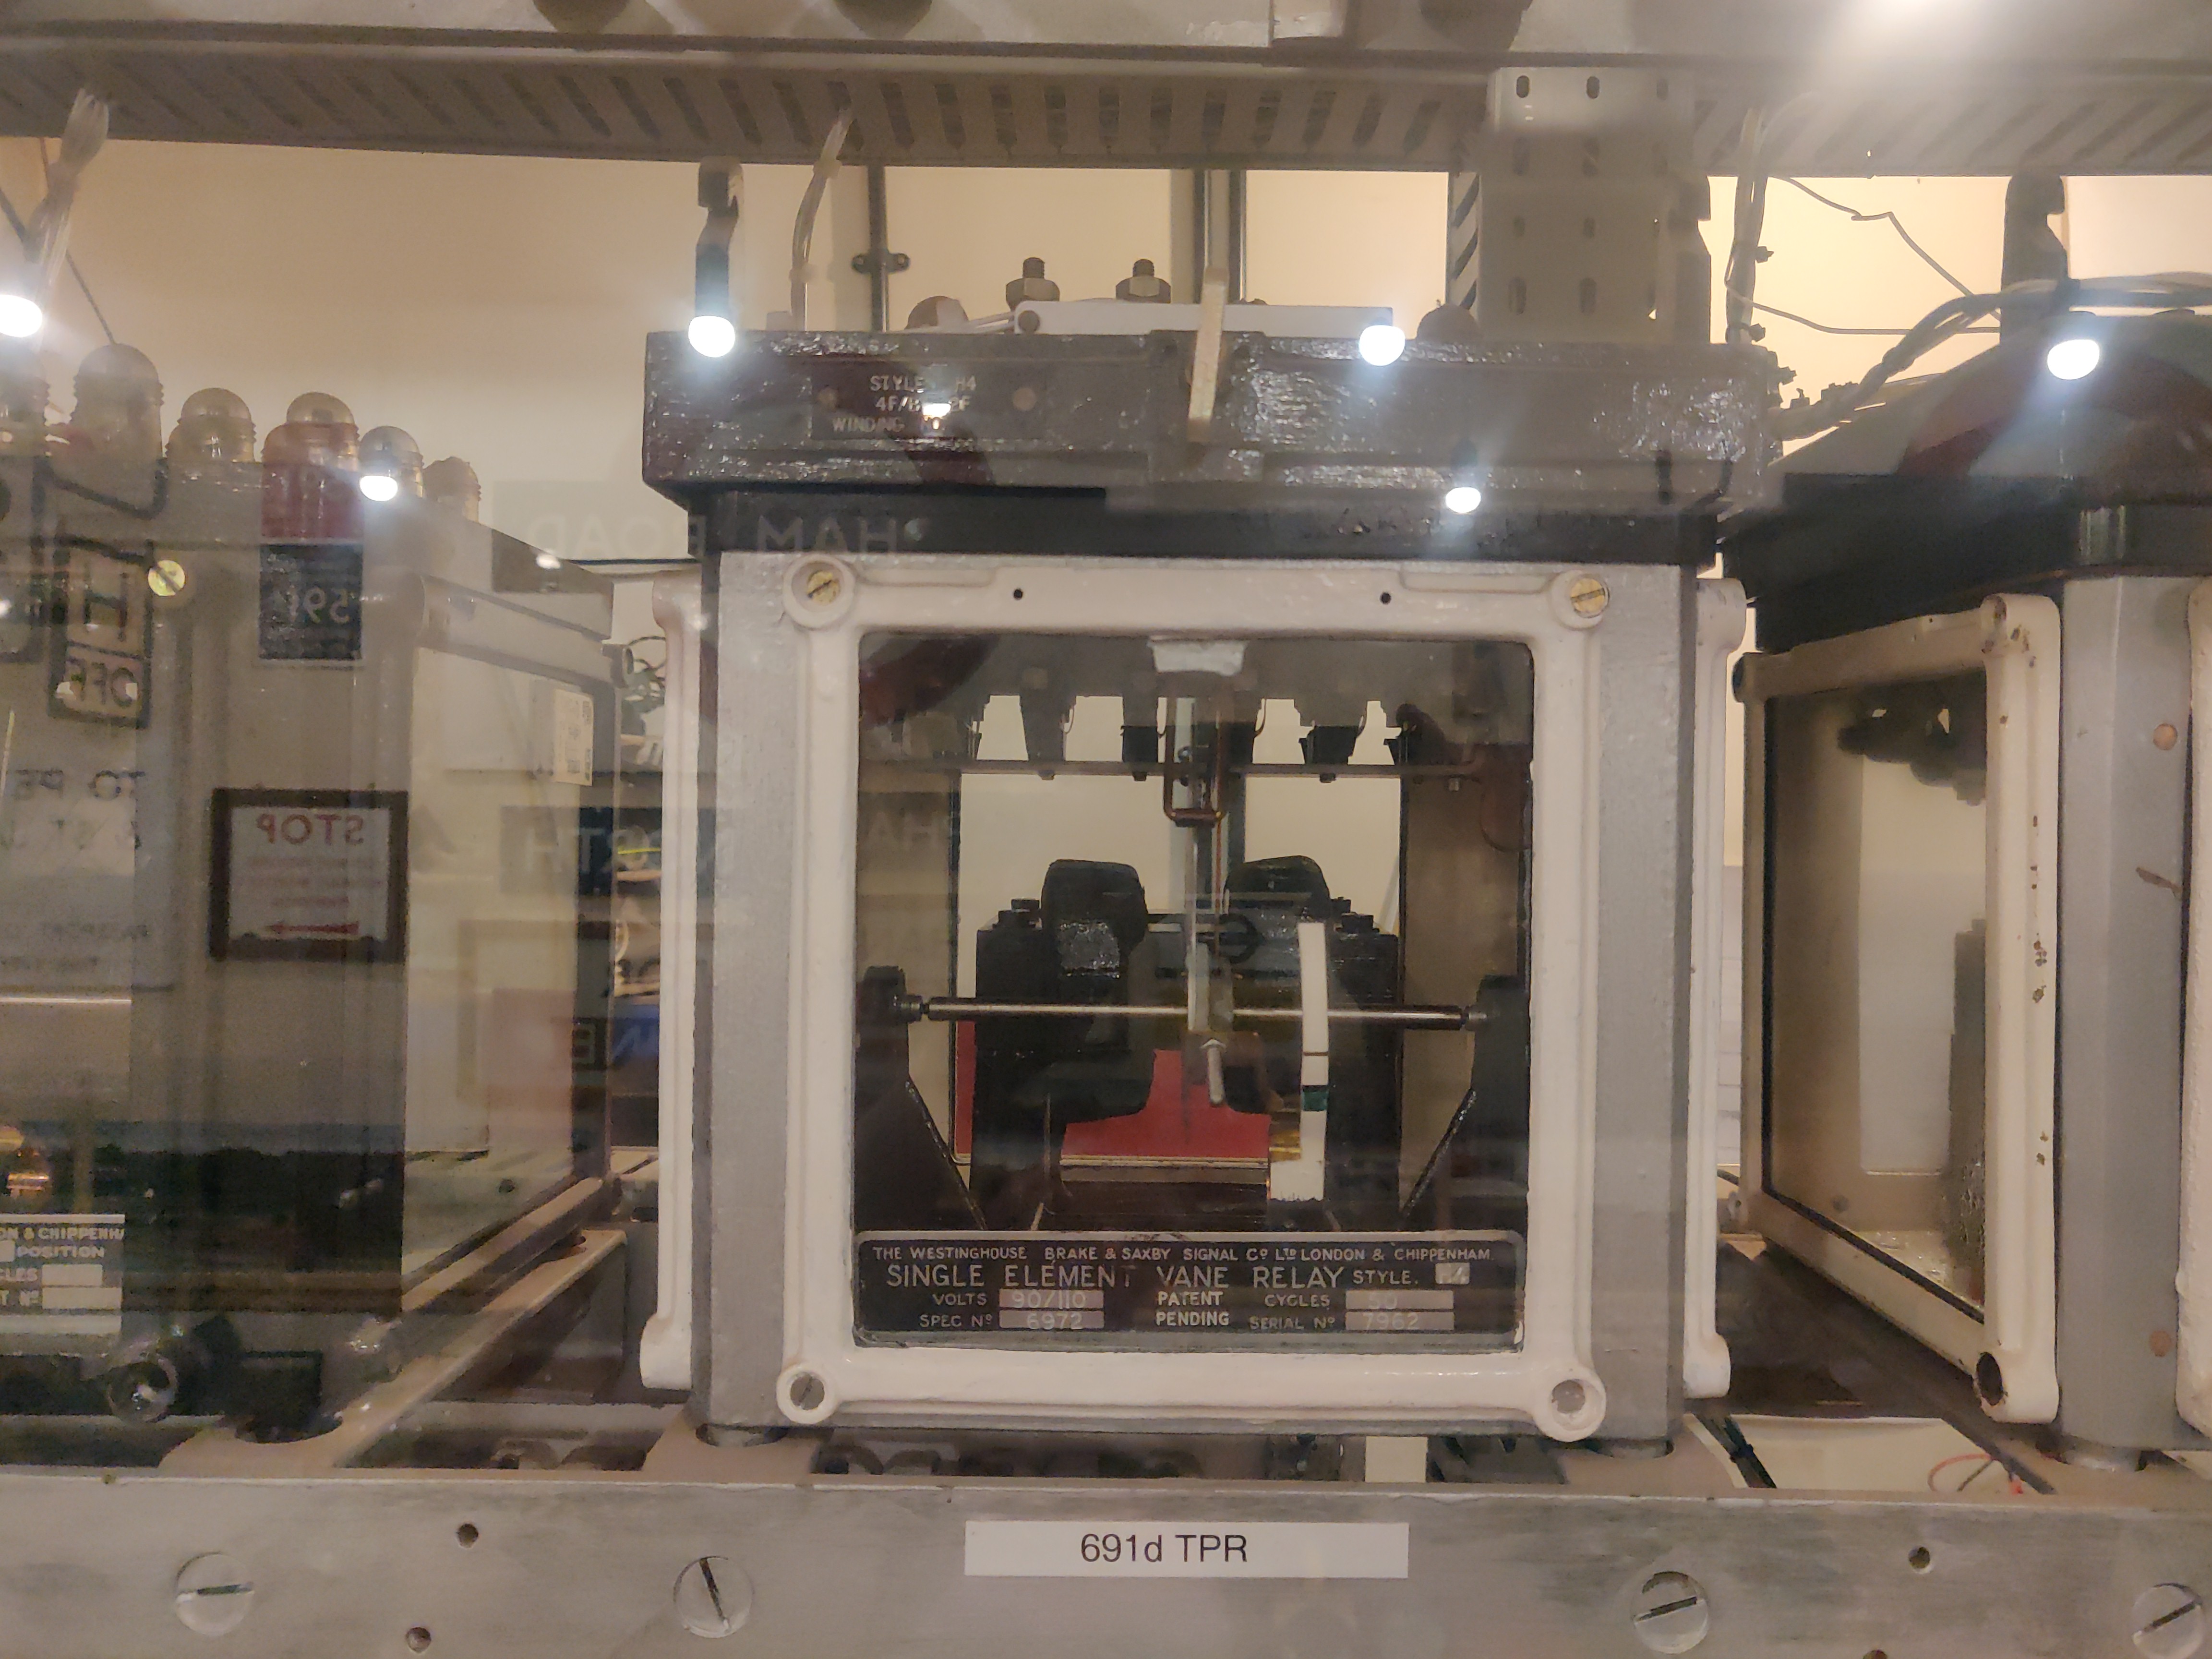
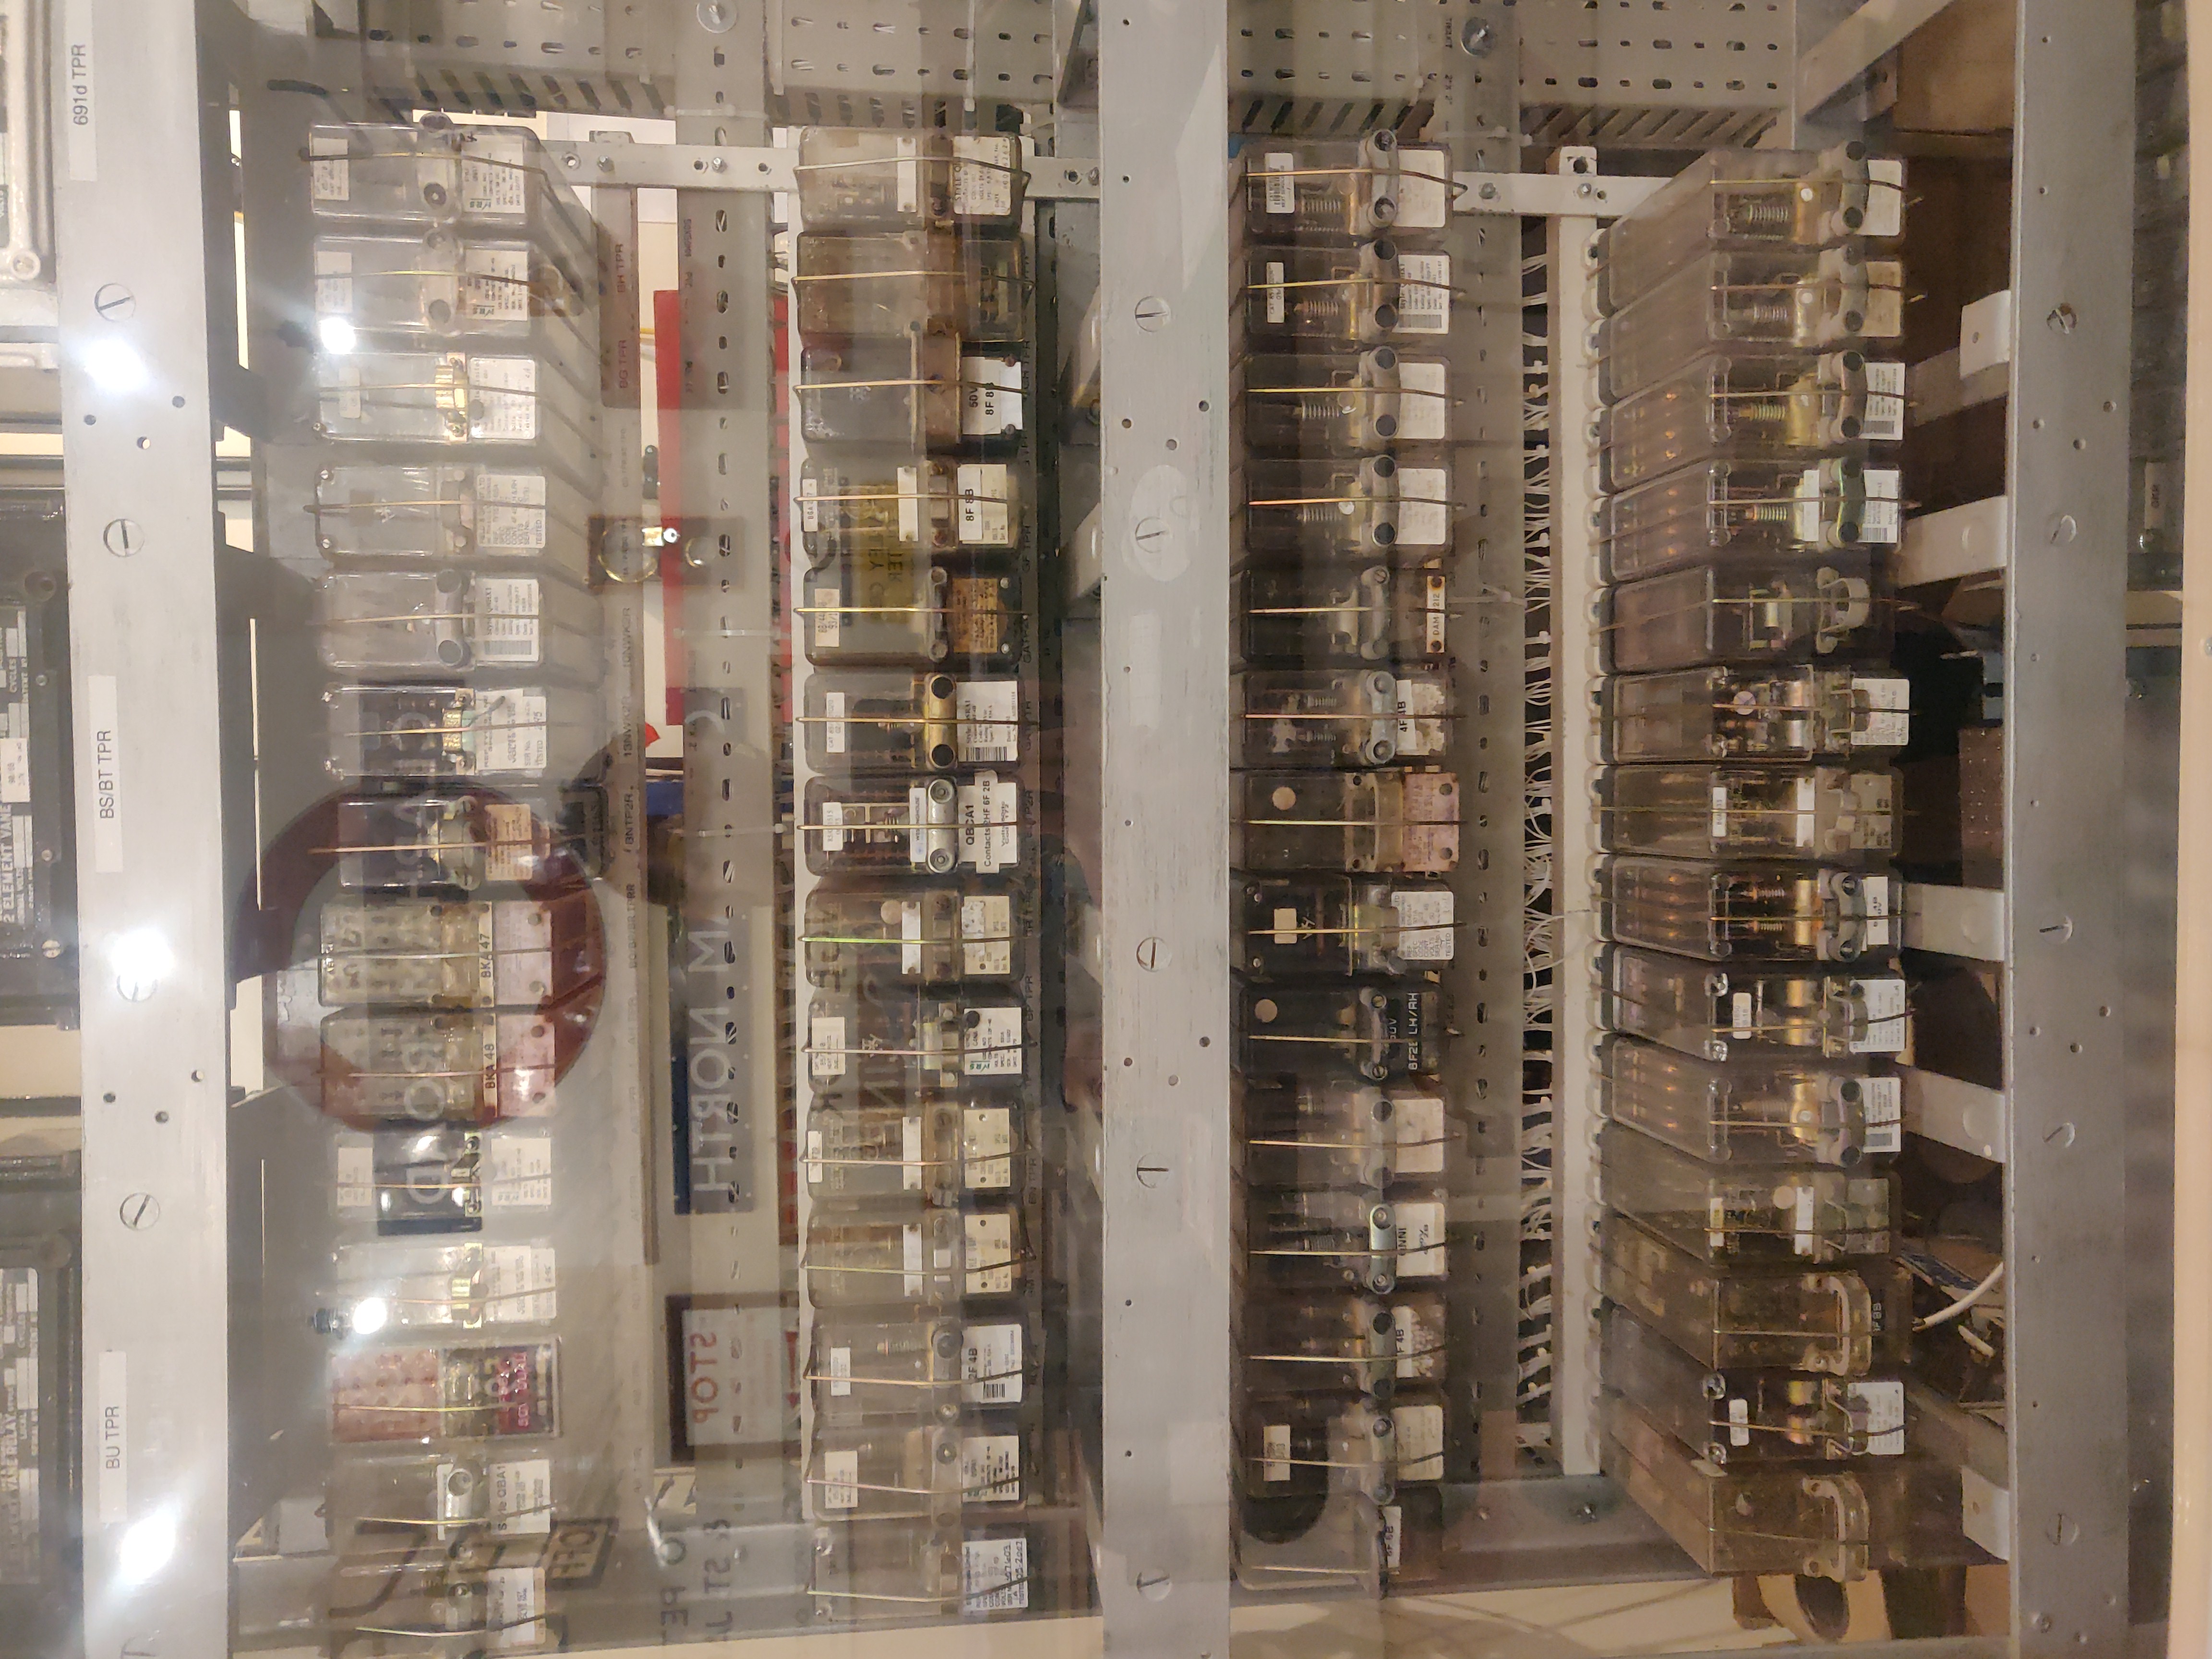 There at least three generations of relay design exhibited. The oldest ones ("fishbowl" relays) are ~ 100 years old and others like them are still running on some railways in India.
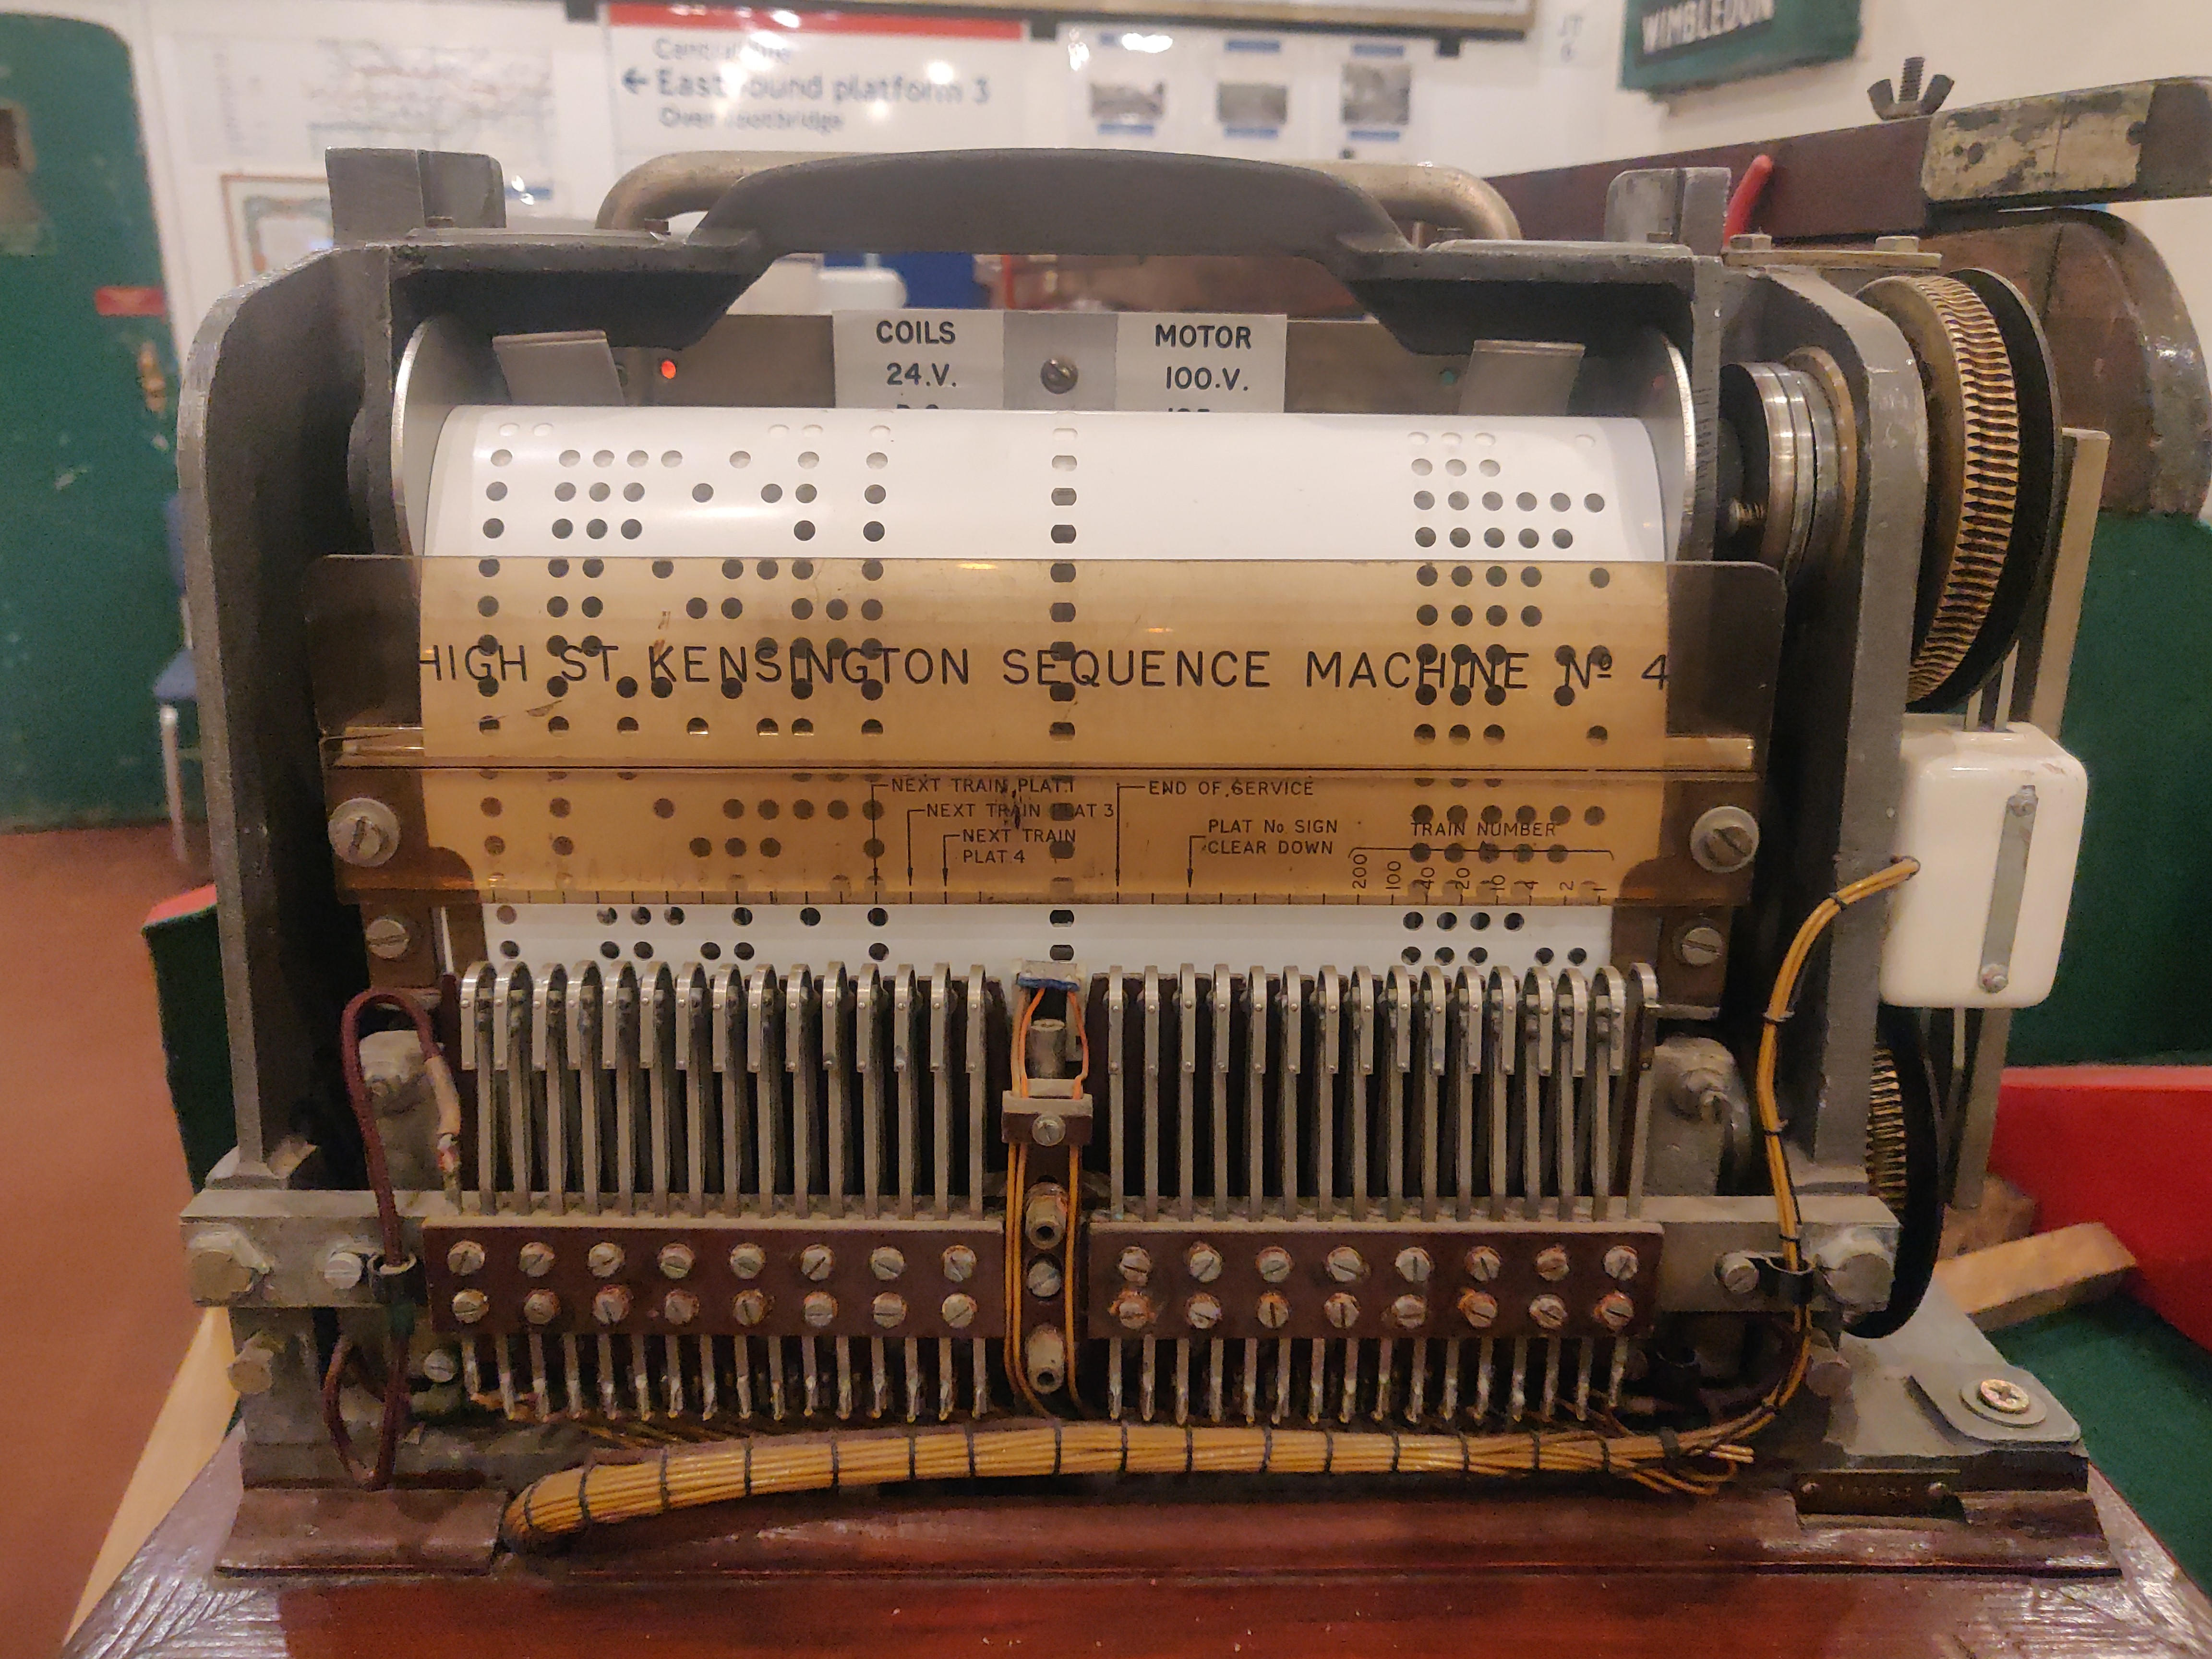 The "train sequencer" machine is a mechanical paper tape reader that knew which train should be where (separate decks for weekdays and Saturday services). Left hand columns were timecode and right hand columns were for the train number. It operated ... relays. There are a lot of relays.
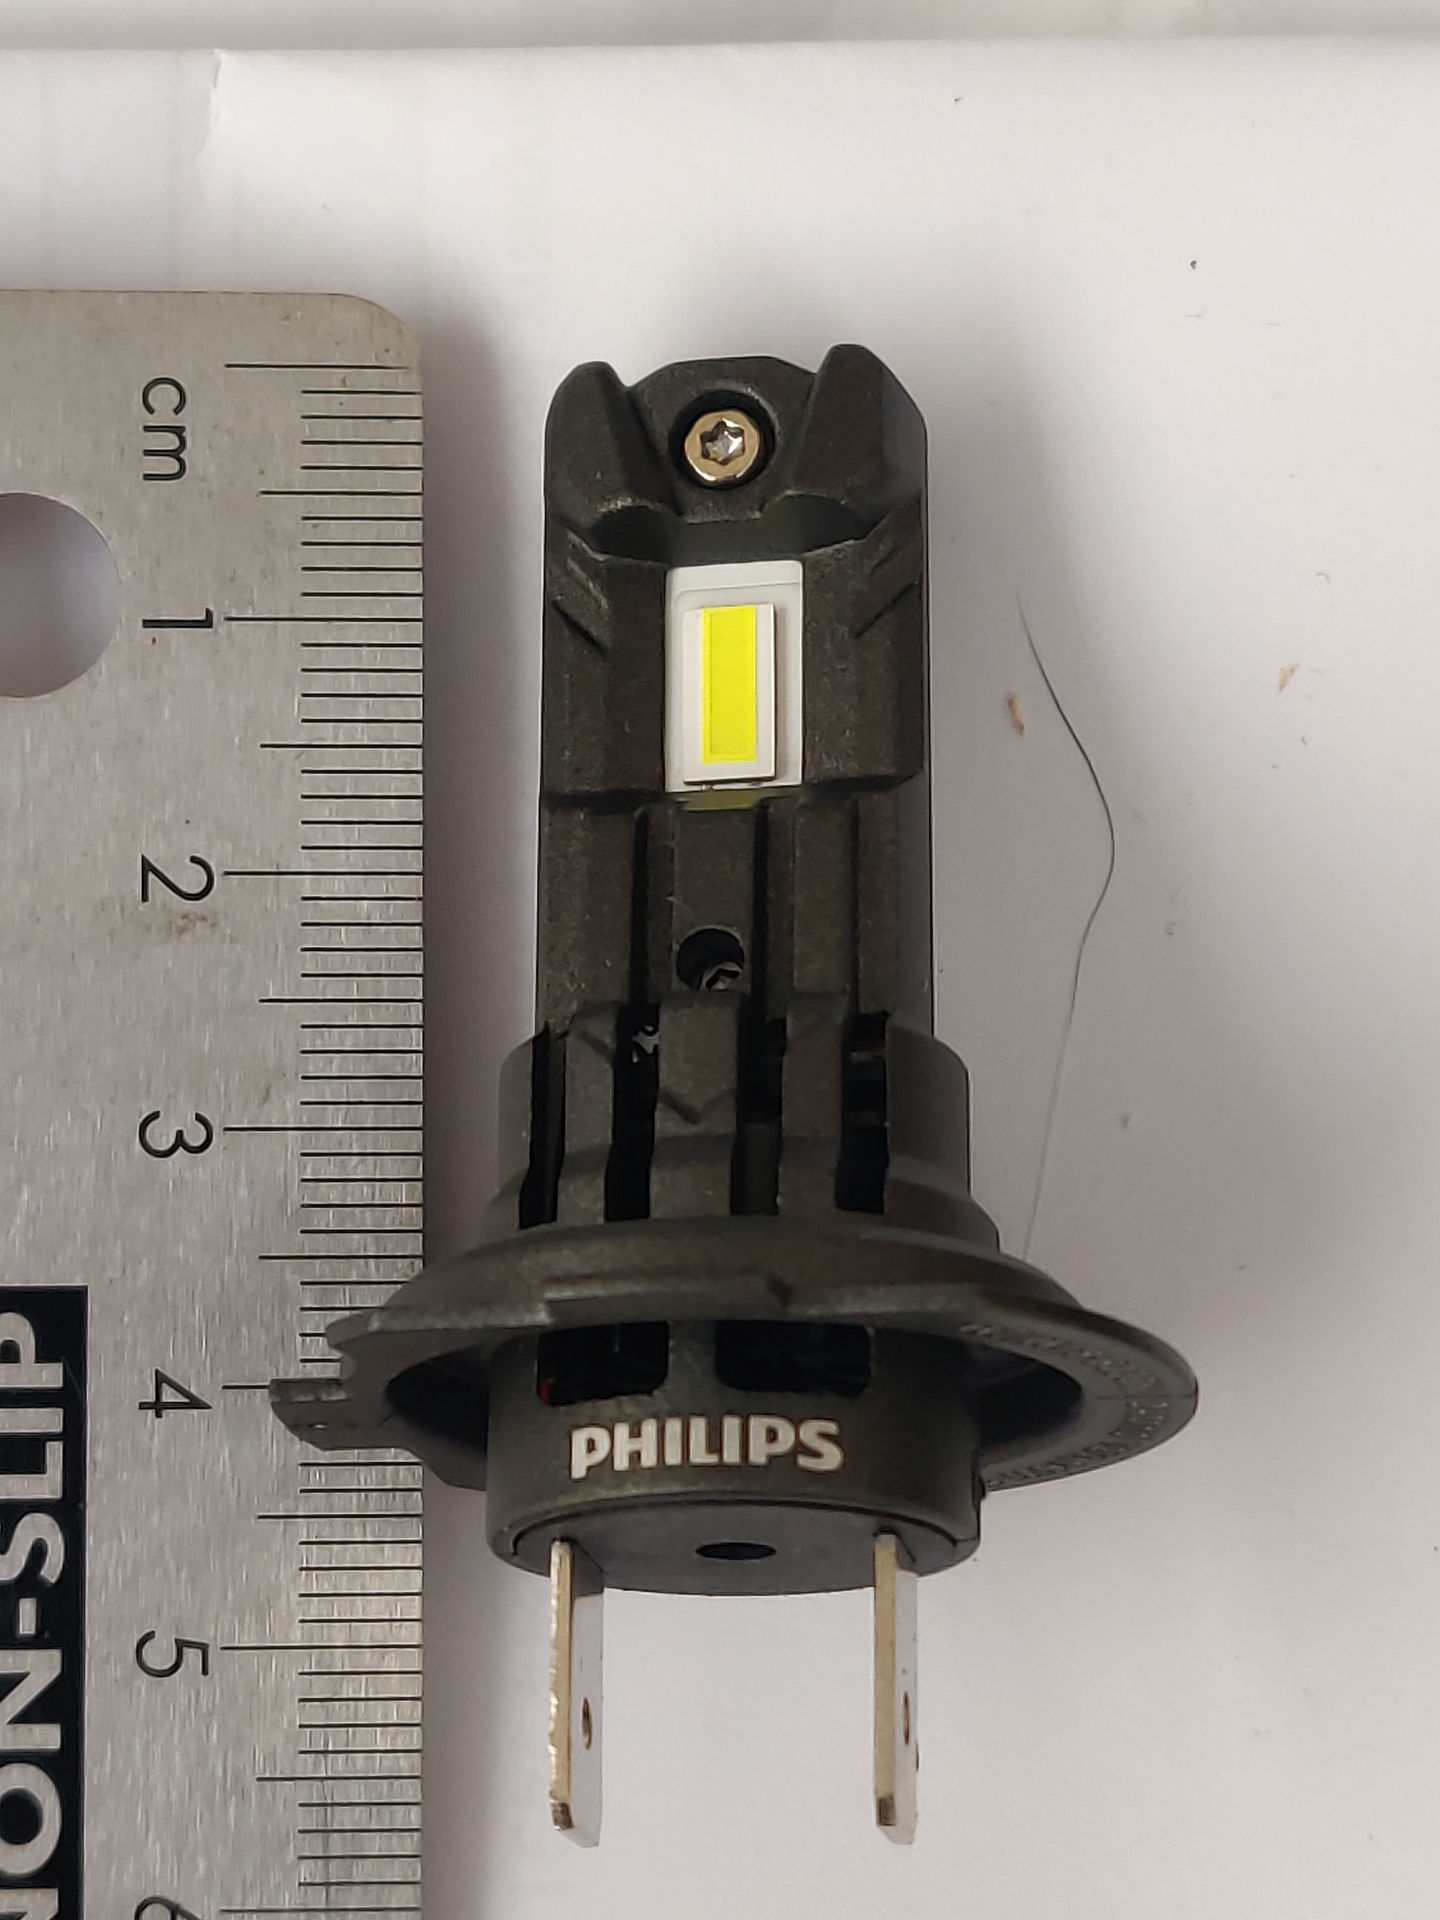 First, choose a compatible bulb. For a CBR600F of this era, that's
H7 - and because there's a big rubber boot that fits over the back of
the headlight, preferably a bulb without a huge great heatsink
sticking out of its base, or any kind of separate transformer box.
And as I want to be reasonably sure that the light is going where I
want it and not straight into the the eyeballs of oncoming road users,
it also needs to be a bulb whose light source is the same size and in the same place as
the filament would be in a filament bulb ,otherwise it'll bounce off
the reflector in the wrong places.
First, choose a compatible bulb. For a CBR600F of this era, that's
H7 - and because there's a big rubber boot that fits over the back of
the headlight, preferably a bulb without a huge great heatsink
sticking out of its base, or any kind of separate transformer box.
And as I want to be reasonably sure that the light is going where I
want it and not straight into the the eyeballs of oncoming road users,
it also needs to be a bulb whose light source is the same size and in the same place as
the filament would be in a filament bulb ,otherwise it'll bounce off
the reflector in the wrong places.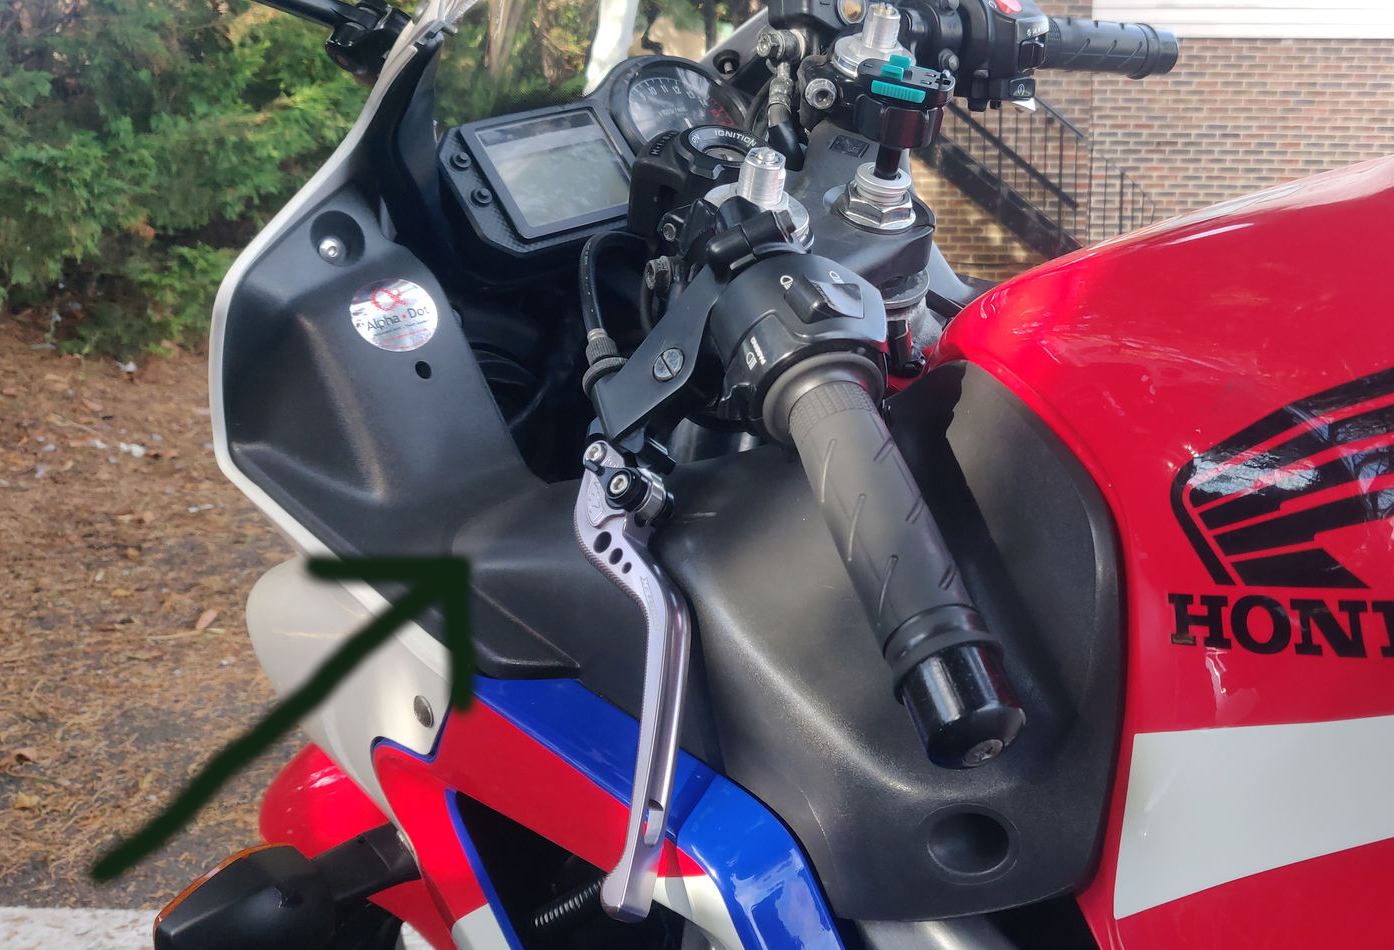
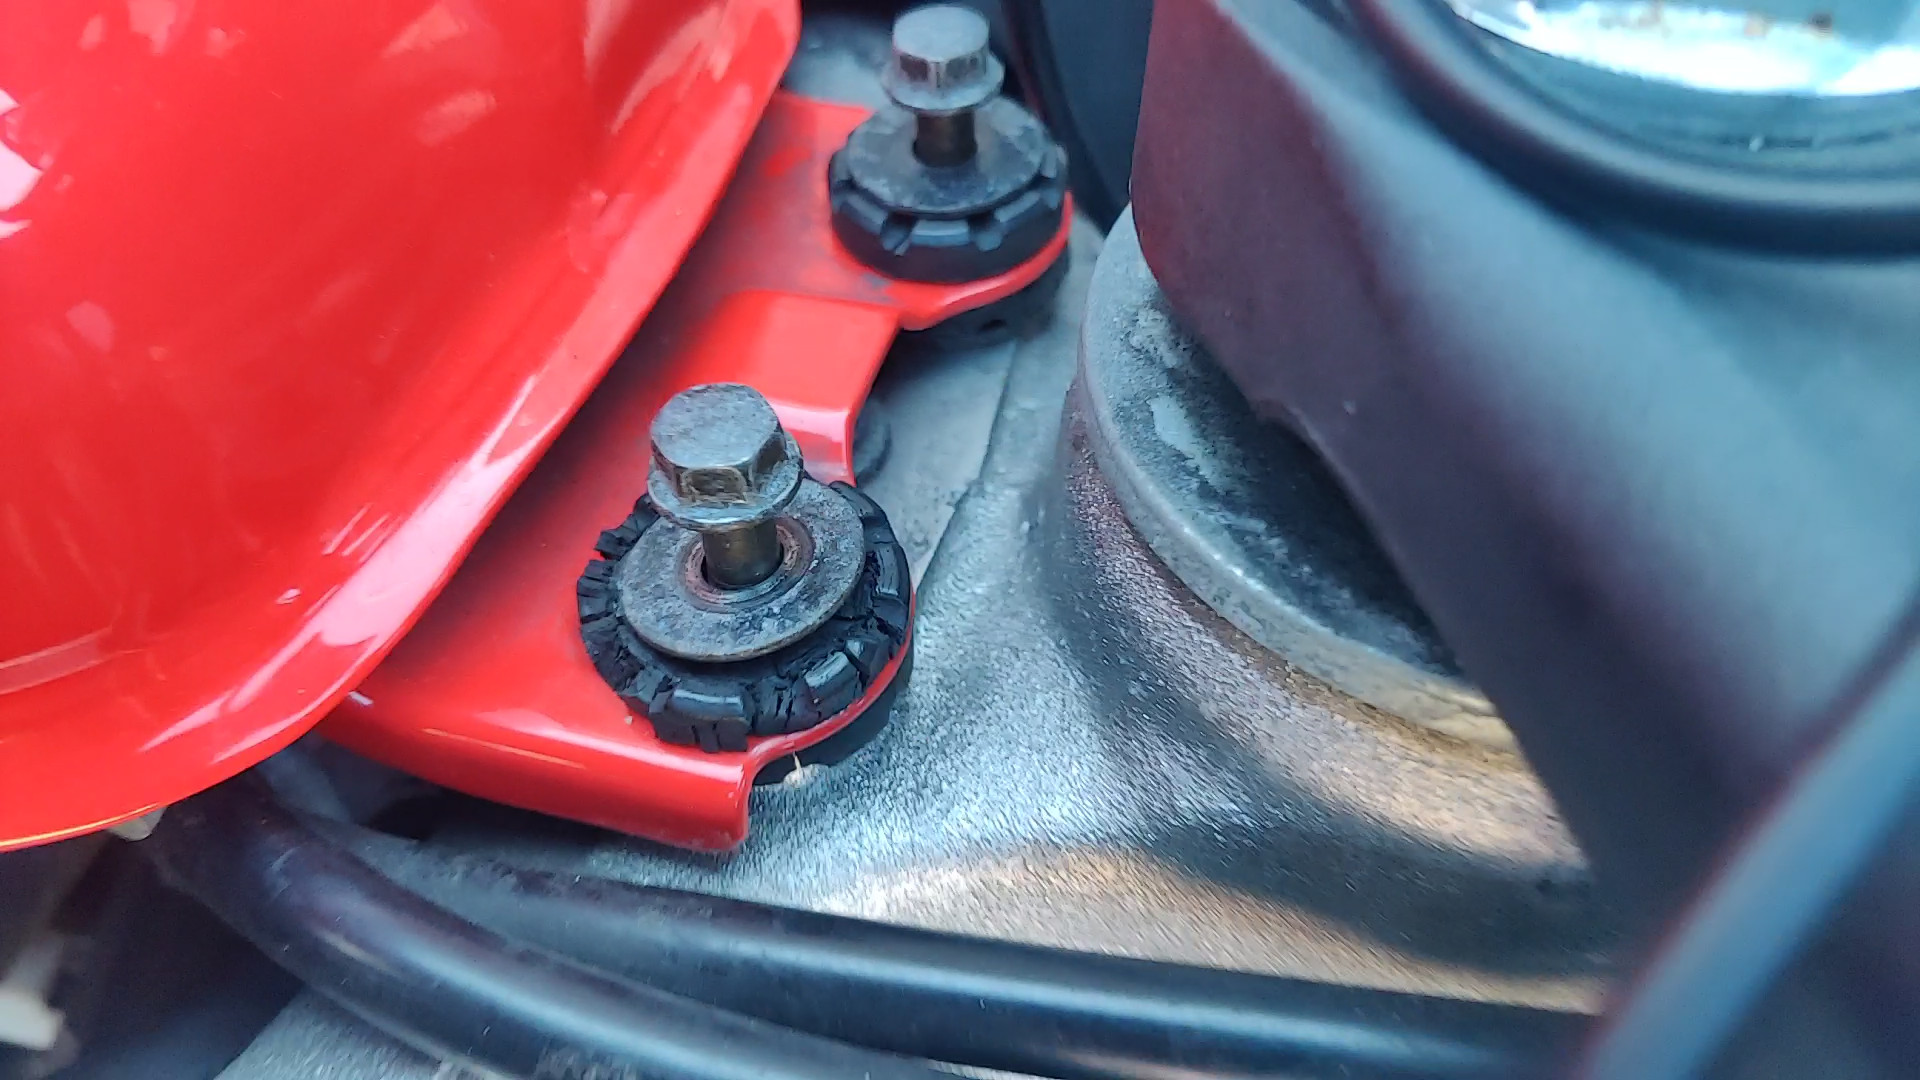 To get to the bulb: first, remove the grey plastic "armrest" thingy on each side: undo two bolts and then carefully manoeuvre and flex the three different bits of interlocking plastic that have prongs sticking into each other, until it comes away. I also slackened off the two bolts holding the front of the fuel tank so that I could lift it slightly.
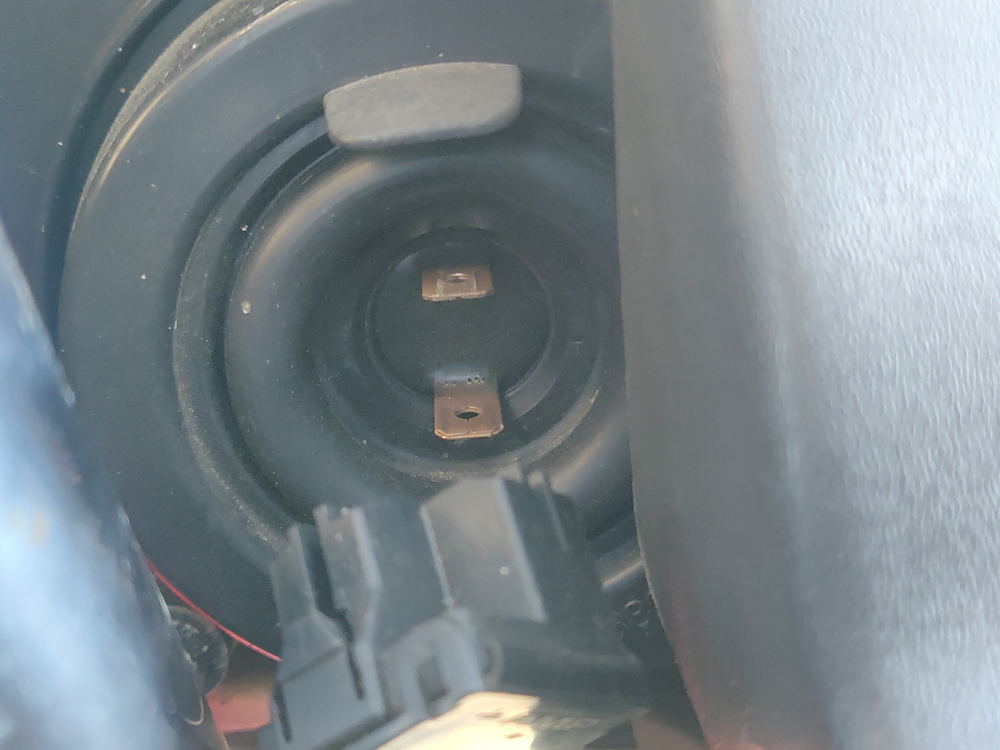
 The headlights are under the dash. The plug pulls off (no fancy release mechanism, just friction) and then the big rubber boot thing can also be pulled away.
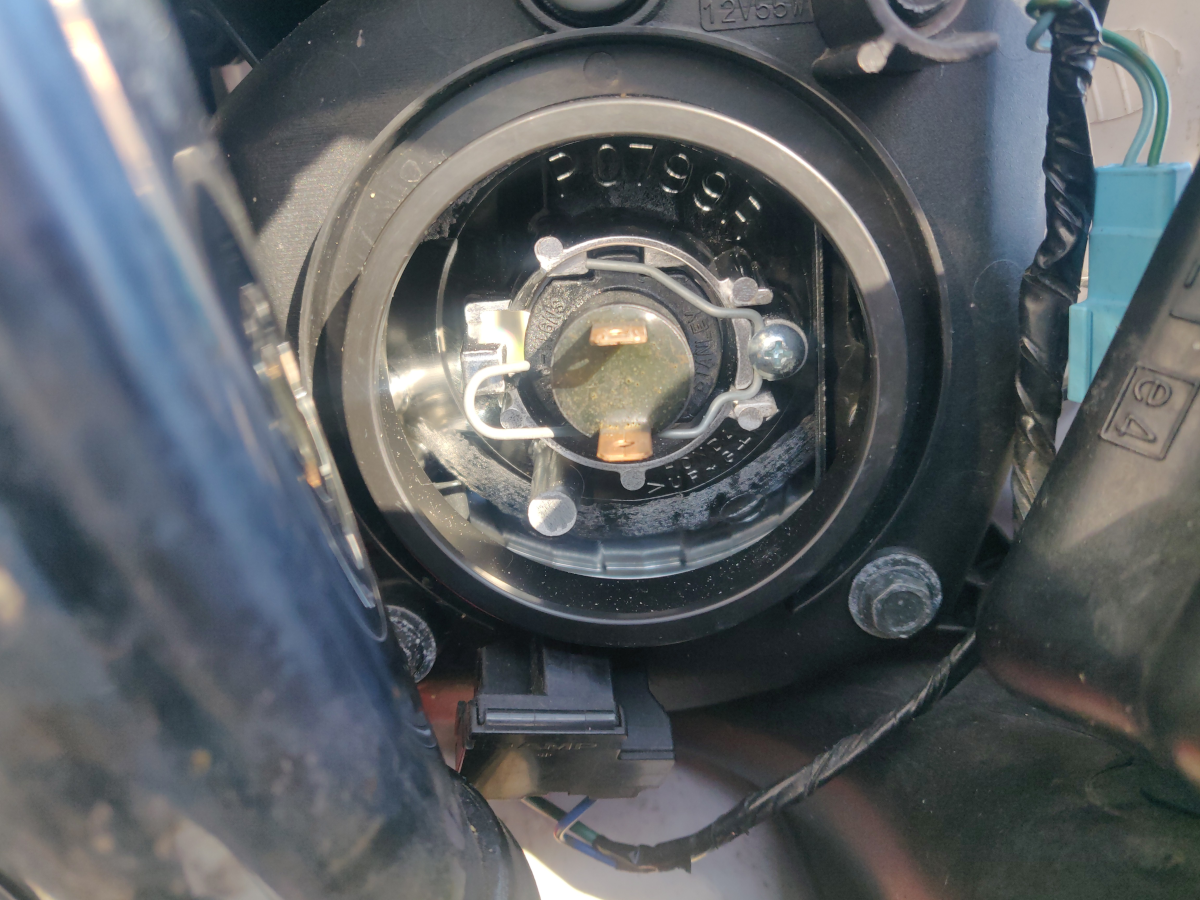
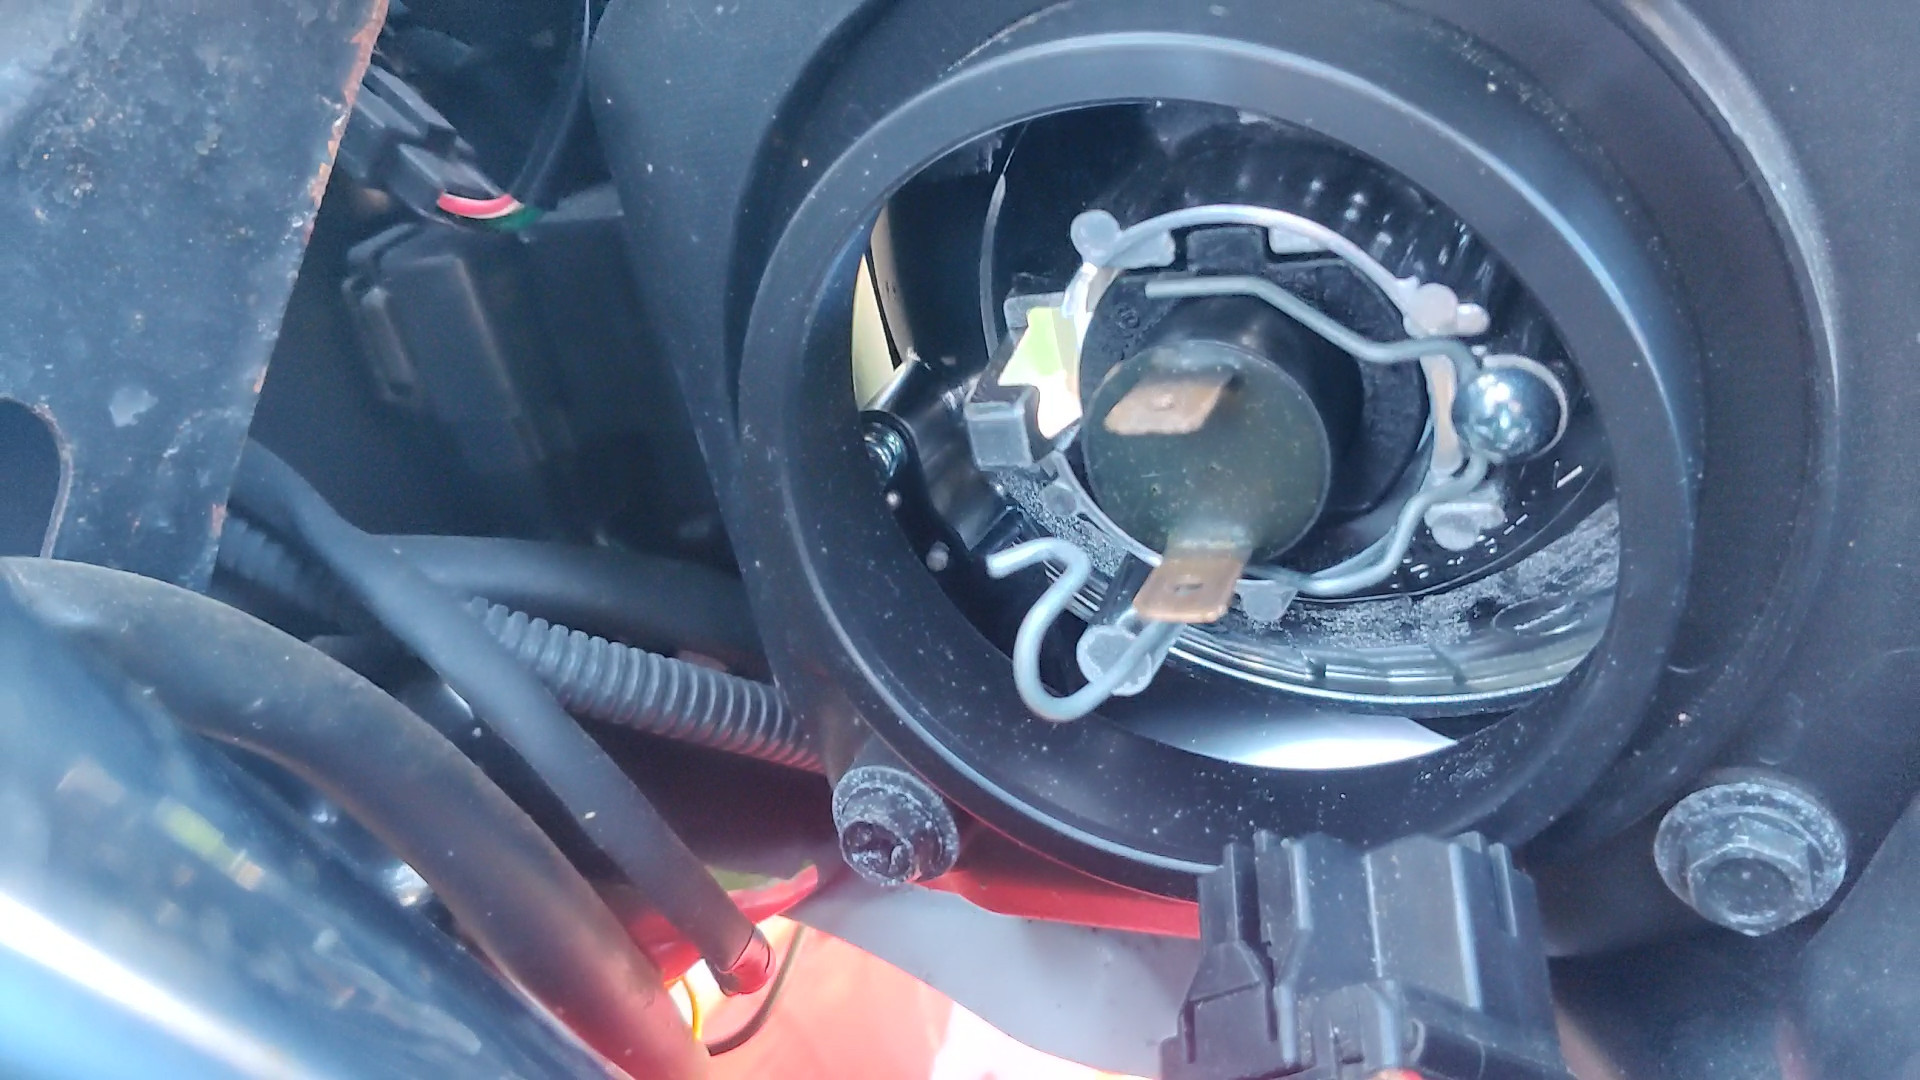 Now unhook the hinged wire retaining clip and it swings open rightwards.
These pictures show both closed and open states (although they are for
different lights and taken on different days: my continuity supervisor
is down the pub already)
Now unhook the hinged wire retaining clip and it swings open rightwards.
These pictures show both closed and open states (although they are for
different lights and taken on different days: my continuity supervisor
is down the pub already)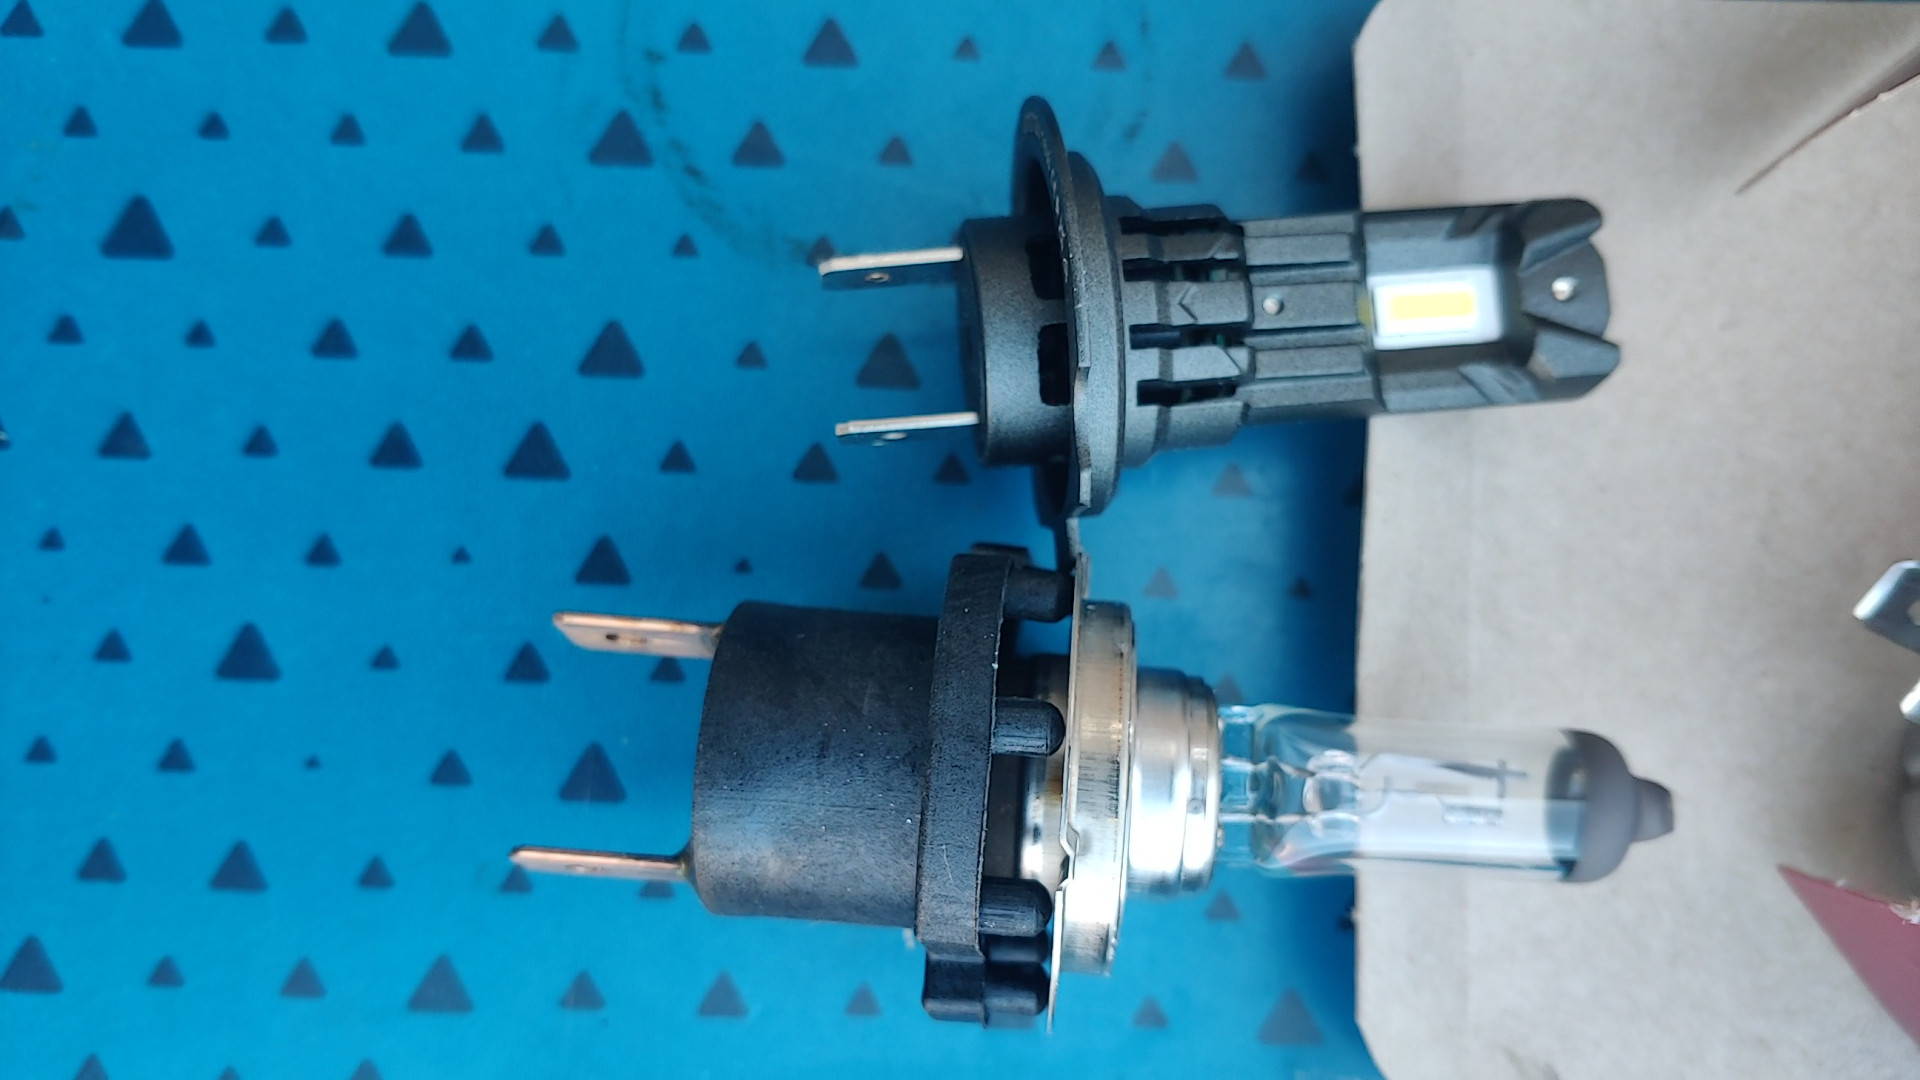
 Here is where I reached for the new bulb and realised that the base of
the old one was apparently bigger. Turns out that the bulb plugs
into an adapter thing, so we take the two parts apart by pulling them (again, no clips or catches just an interference fit)
and push the new bulb into the adapter instead.
Here is where I reached for the new bulb and realised that the base of
the old one was apparently bigger. Turns out that the bulb plugs
into an adapter thing, so we take the two parts apart by pulling them (again, no clips or catches just an interference fit)
and push the new bulb into the adapter instead.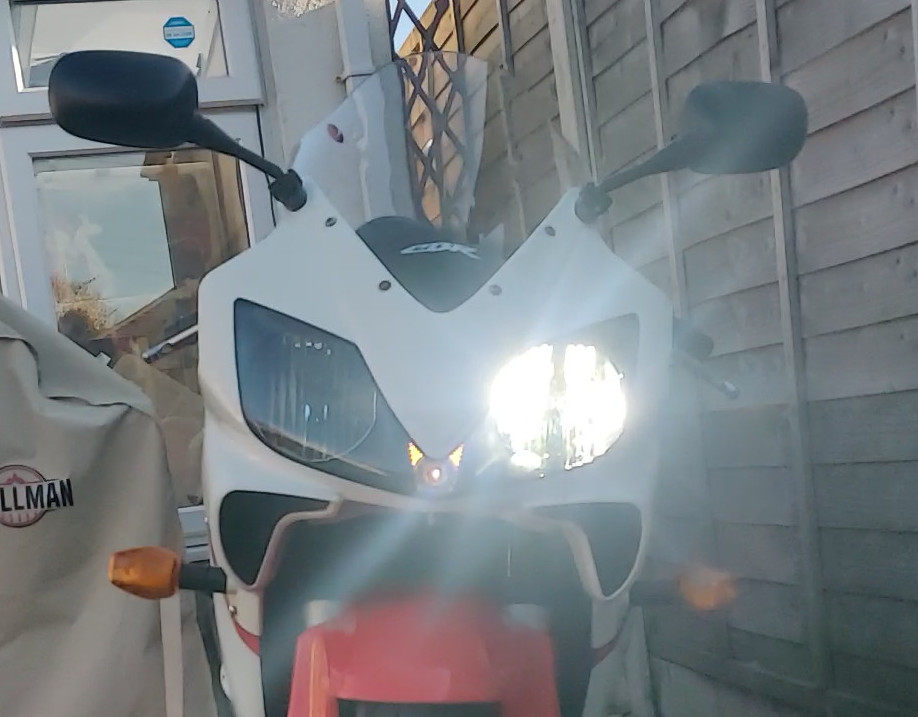
 Reassembly is, to coin a phrase, the reverse of disassembly. Taking phonecam photos of a light source is probably pretty pointless - during daytime, likely doubly pointless - because of auto exposure, but I did it anyway. The dipped beam only turns one light on (this is normal) and the full beam seems to be very very bright, but maybe that's full beam doing what full beam does.
 A better test was conducted after night fell, but my phone decided to take the "before" and "after" photos with different exposure settings (and it's not even as dark in the first one) and I'm buggered if I'm replacing the old bulbs in the dark for a side-by-side comparison. If it looks brighter even though there's more ambient light, that's good right? (Science r us)
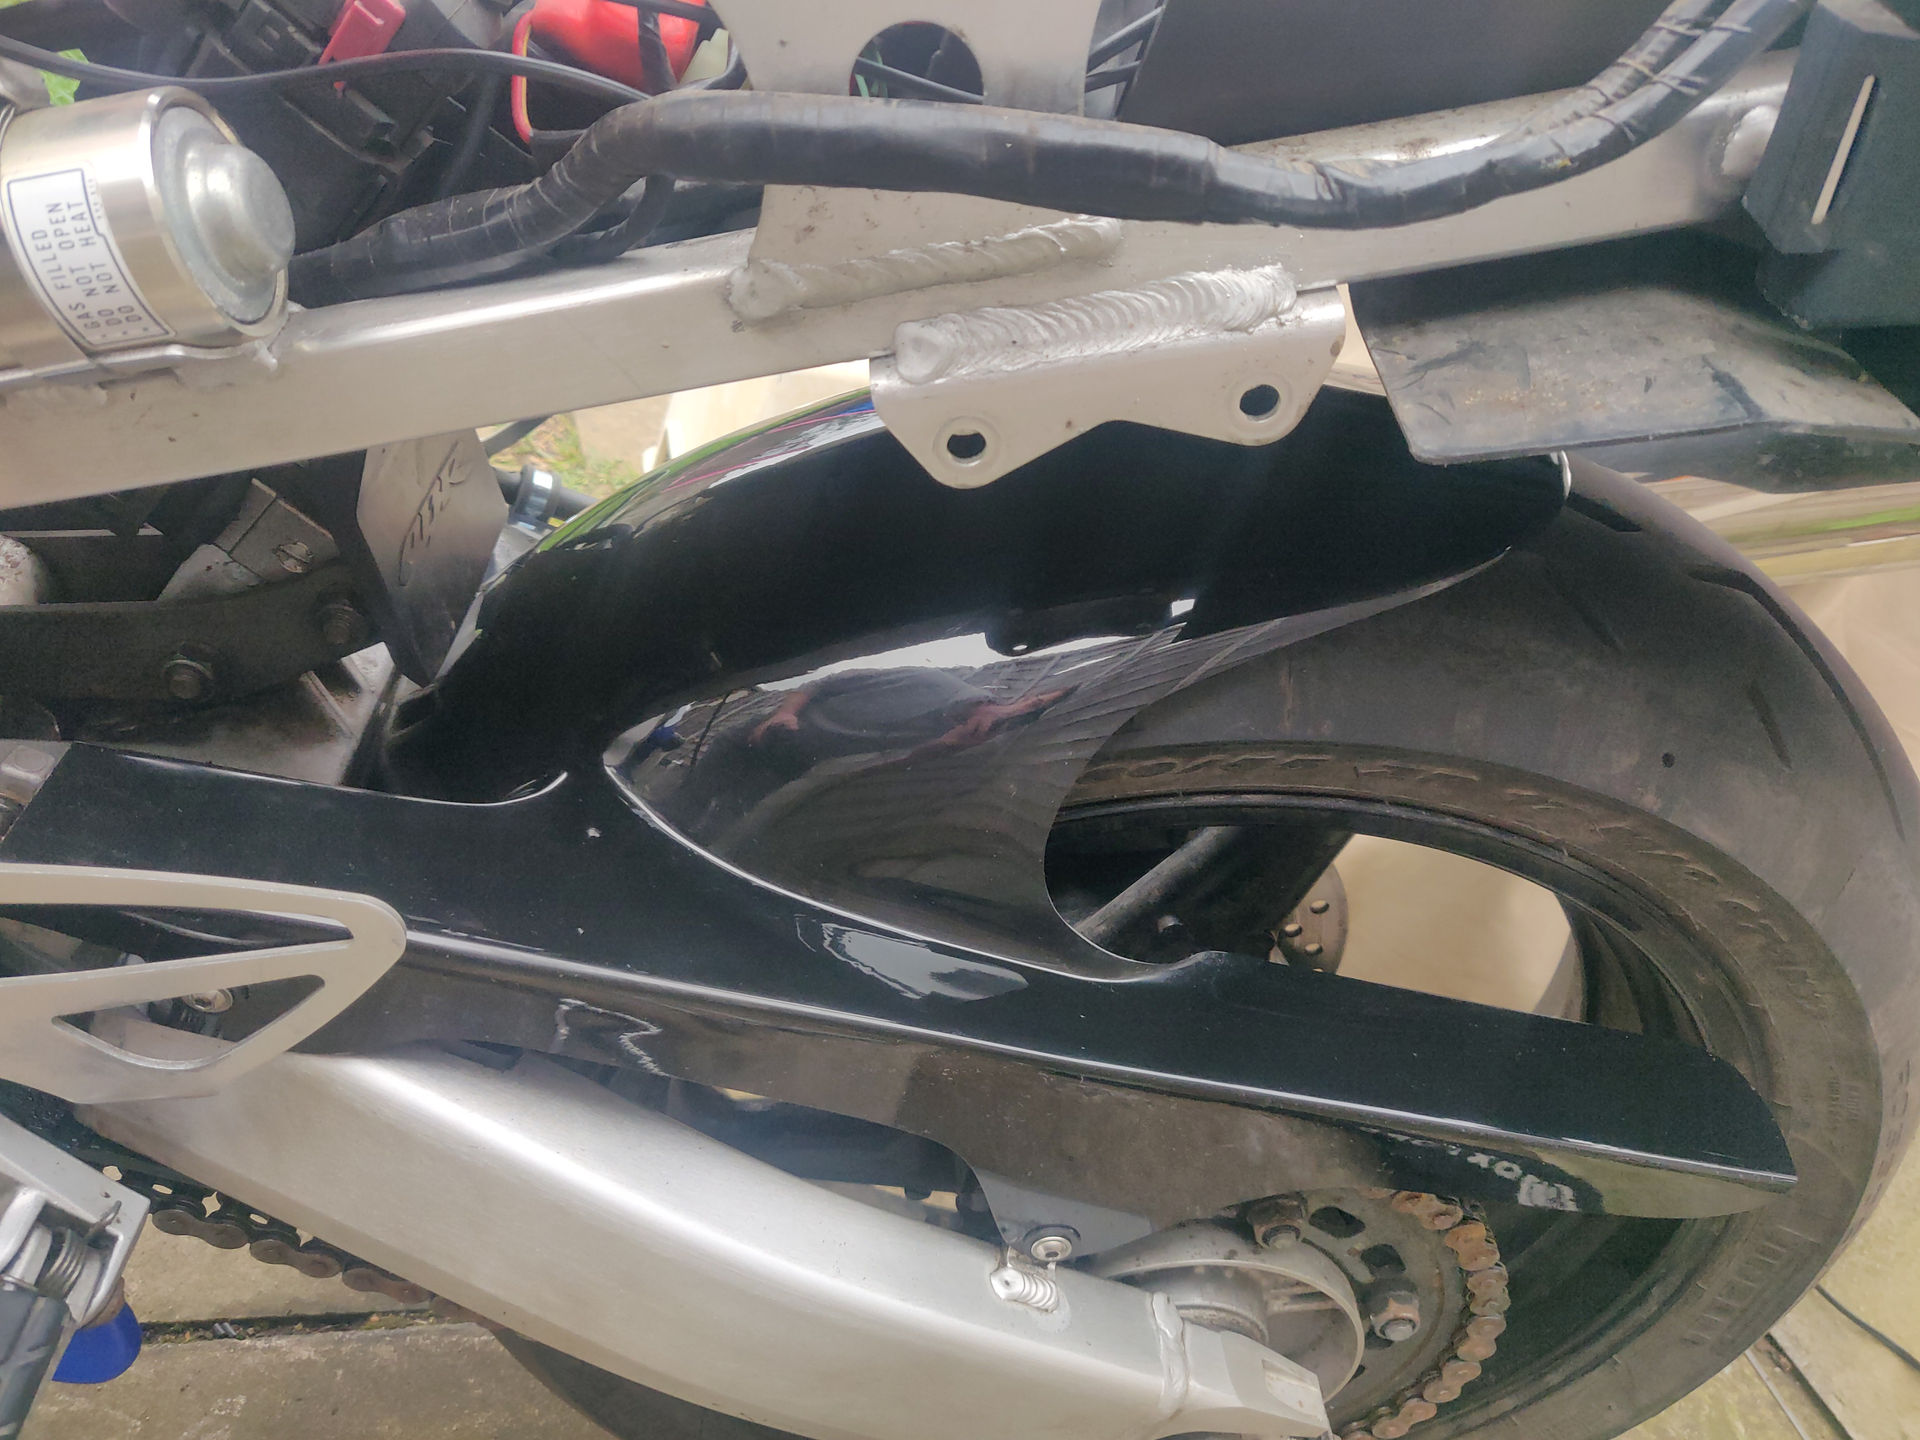 I bought this Skidmarx rear hugger back in August but when I (perhaps foolishly)
asked my insurer about it they said it would add £200 to my premium so
I didn't fit it then. Fast forward to renewal time, at which time I
told the insurer I had a hugger and crash bungs and braided brake
lines (which I haven't even ordered yet but intend to) and it made all
of about £3 difference to the renewal price, so yesterday I added this
to the bike.
I bought this Skidmarx rear hugger back in August but when I (perhaps foolishly)
asked my insurer about it they said it would add £200 to my premium so
I didn't fit it then. Fast forward to renewal time, at which time I
told the insurer I had a hugger and crash bungs and braided brake
lines (which I haven't even ordered yet but intend to) and it made all
of about £3 difference to the renewal price, so yesterday I added this
to the bike.